Driving the front wheels with a chain. This isn't rocket science but it is a challenge because there is not very much room (fore and aft) to place the engine. Remember this is a gas coupe that will also run as an altered. So I can't move the engine any farther forward than the body panels will allow. Otherwise I will be only able to run competition coupe.
This all mandates using a very short chain which brings a set of problems to play and especially the critical issue of chain alignment. Plus I want to run this setup at Maxton (1 mile), Loring (1.5 miles) and Bonneville (short course -3 miles) so I have to plan of being able to change ratios without disassembling half the darn car.
This has been done before. A Geo very much like mine was put together on the West Coast a few years back using an earlier CBR600. The critical component was the fabrication of bearing blocks to carry the Geo differential. See
http://psiman.net/index.php/finished_projects/geo/ I contacted the people that had fabricated that swap and was able to get their remaining bearing blocks for the cost of shipping. I also found out that the original car was later sold to a racer that swapped the CBR600 for a CBR900 and used it to win a 24 hour road race – 24hours of Lemons. That was a good test to show the open, non-lubricated diff can survive.
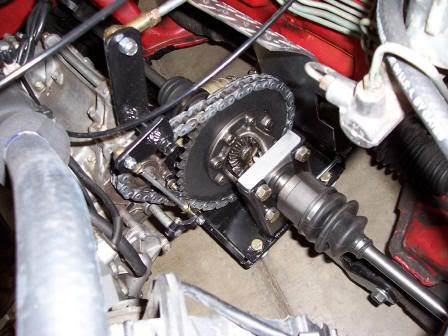
Here is a photo of the west coast car with the original chain drive conversion.
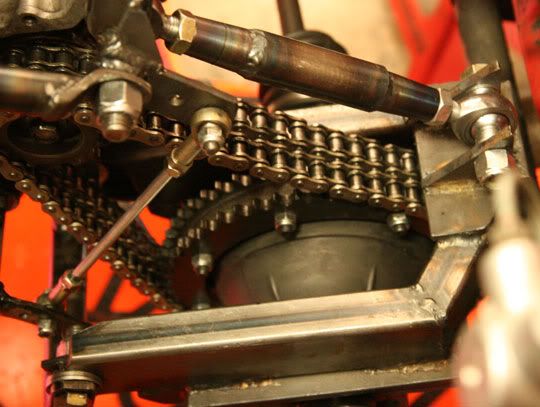
After some time running the original conversion the current owner decided to redesign the chain set up. He chose to use two chains. The newer setup is shown below;
I don't feel need to go with a double chain. For one reason I don't have as much clearance around the engine sprocket. My cbr600RR has a different water pump design and location which it inhibits what I can use as a drive sprocket.
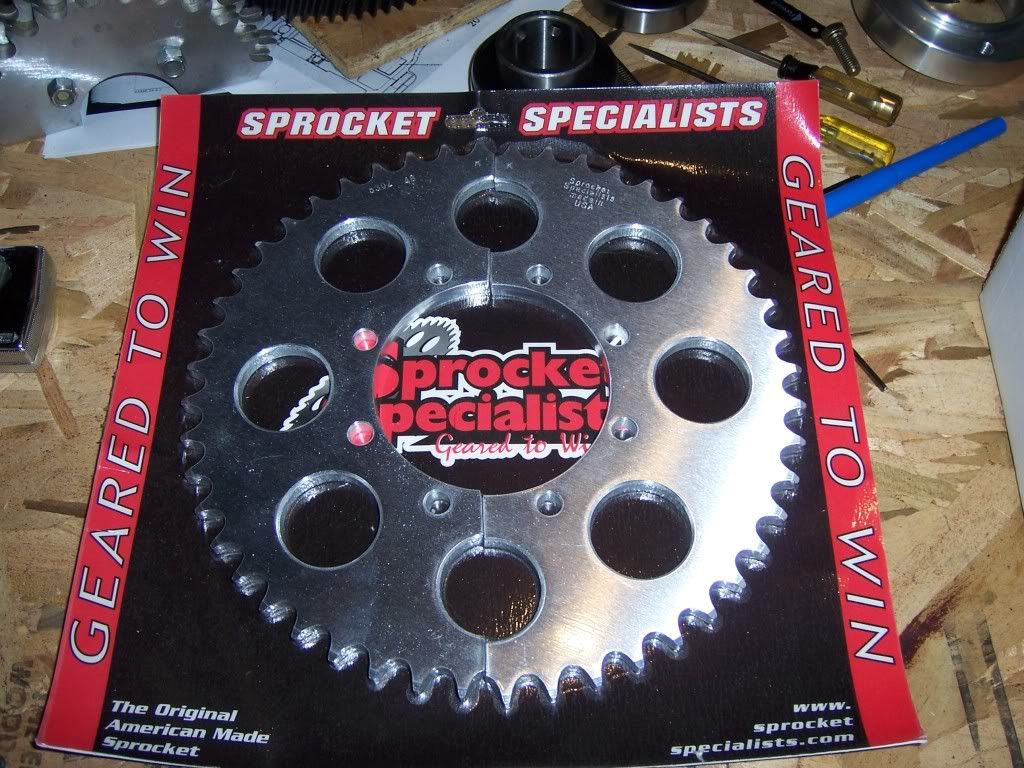
After running several spread sheets with ratios, speeds etc I decided to use a driven sprocket with 45 teeth and if that one is too difficult to pull I also ordered one with 48 teeth. I ordered the custom sprockets from Sprocket Specialties. They are split sprockets so I can remove/change them without removing anything accept for the chain. Sprocket Specialties also provided me with the drive sprocket to adapt a 530 chain (original equipment is 525) for the Honda.
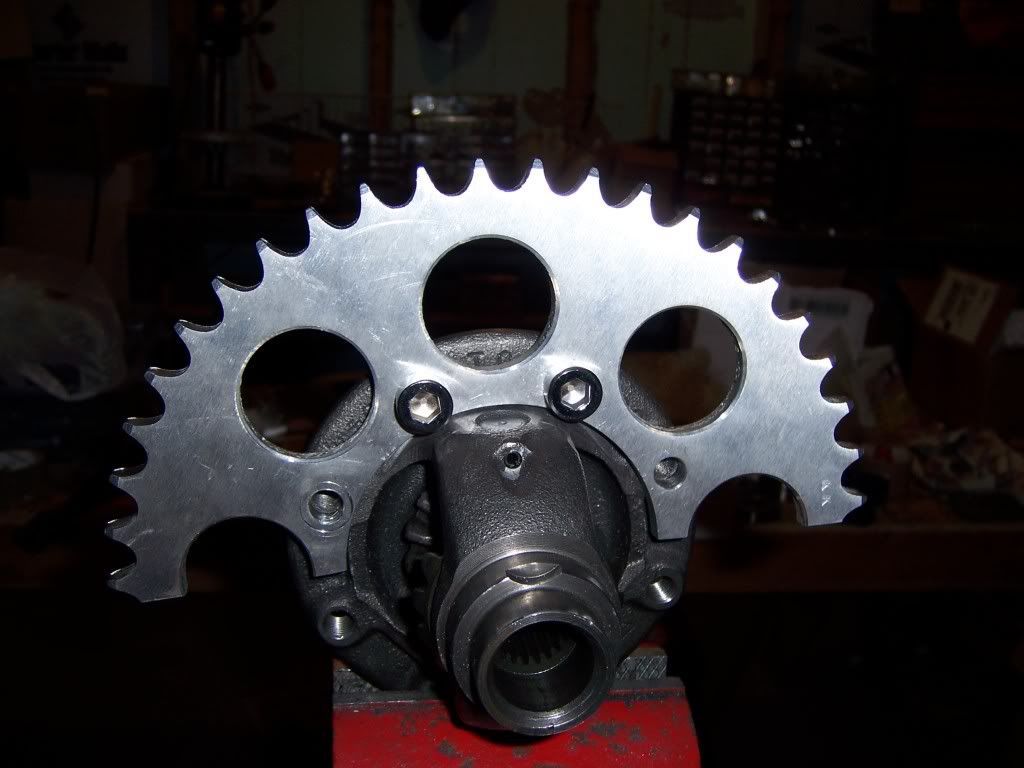
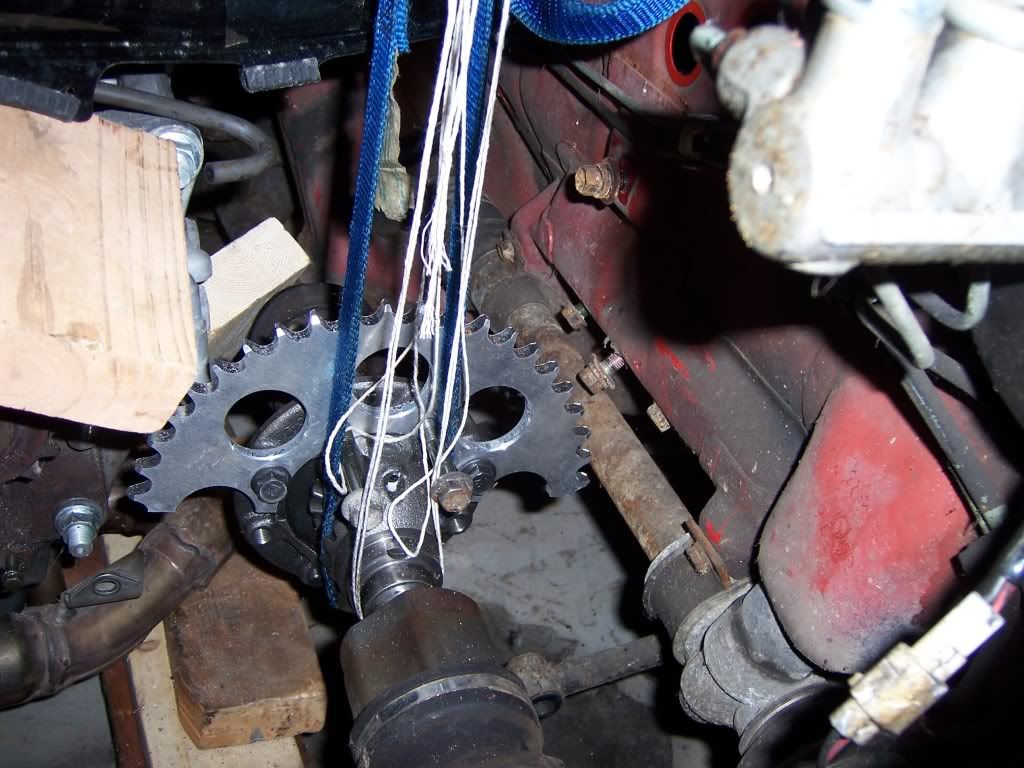
I am using a 530 chain – which is wider than a 520 or 525 chain. I decided to do this because it allows for thicker sprockets. I don't want to be tearing up sprockets. However with the thicker sprocket and chain I have almost no room to mount the driven sprocket on the right side of the ring gear mount. So I am moving it to the left side. This provided a small clearance problem for center opening of the driven sprocket. I realized that I would either have to remove a little metal from the diff or from the sprocket to get a good fit. Before I did that I loosely mounted half of the sprocket to test fit the engine, diff, etc in the car to see how everything lined up. Here is a photo of my diff with half sprocket mounted on left side of ring gear flange.
Here is the engine propped up in the car with the diff attached to the half shafts and hanging from a strap in the position where it will be when the car is finished. The camera angle is a bit deceiving. There is actually more clearance between the steering rack and the sprocket then it appears. The wooden block is covering part of the drive sprocket but you can see some of it to the left and below the block. As you can see this will not be a very long chain.
The good news is that everything lines up. I also was able to discover that the engine will need to be tilted a few degrees nose up to prevent the chain from hitting the engine case below the sprocket.
Now I can proceed to modify the differential and mount the sprocket, bearings and bearing carriers.


