Well, Brian hit the high points, so I'll throw up some more detailed stuff, just in case anyone has any interest at all in our project.
This is how we arrived at the profile. In one of the earlier pictures you can see Brian laid out on the frame. Here you can see the cardboard profile where we traced his outline. At this point we were using very precise SWAG methodology to determine the optimum aerodynamic shape

. We had committed to the rear but were still sketching on the front.
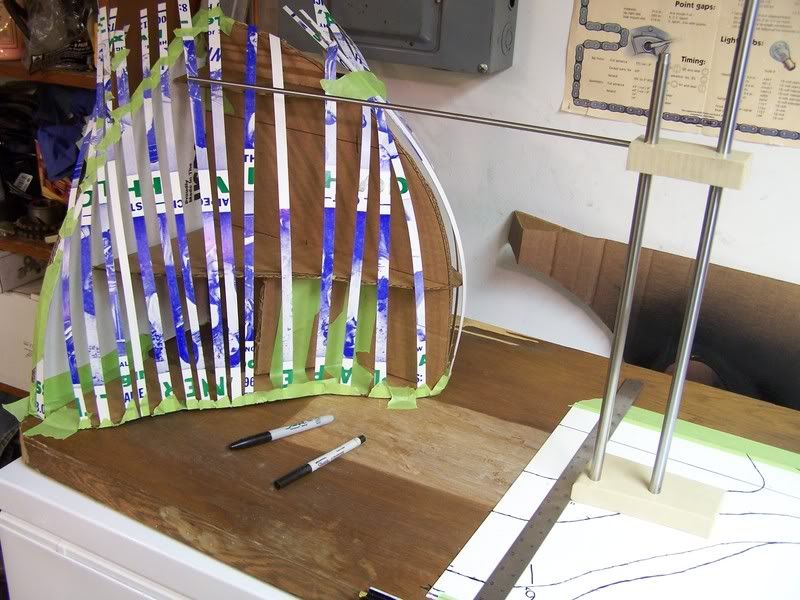
Developing the shape of the front fairing. This is the first (very rough) draft mock up using cardboard and poster board to help visualize the shape. You can see the rig I made up to transfer the profiles at different heights to heavy plastic sheet in order to create the station formers for the plug.
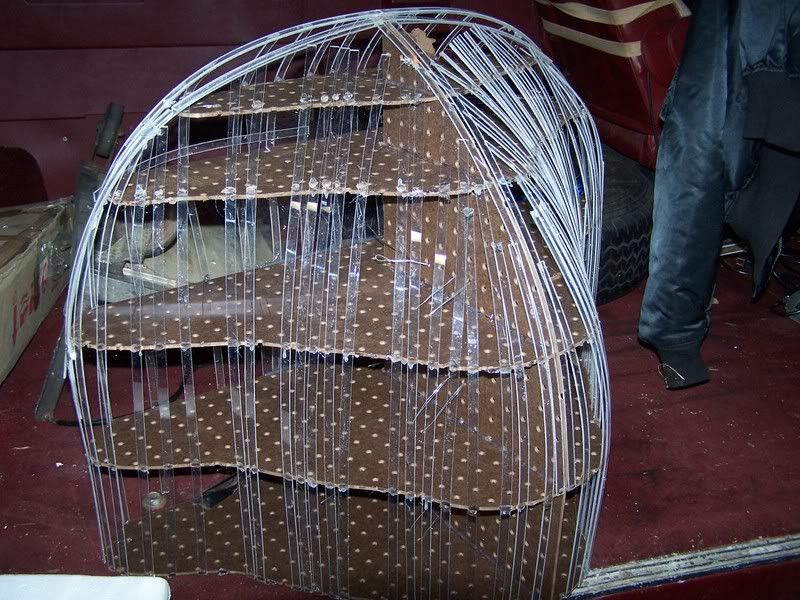
Profiles cut out, ready to be transferred to heavier material.

Formers made and "egg crated" together, with thin Lexan strips laid on to establish the surface contours. Think cedar strip canoe construction. This seemed to be the easiest and quickest way to get the smooth compound contours that we were after. I know a lot of folks use foam billets and carve the shape. I've tried it in the past and always have a really hard time getting 2 sides that are even close to the same shape. Besides, I hate the mess that sculpting foam makes.

Brian pretty much covered the rest of the fairing earlier, so we'll let the fairing tech die now.
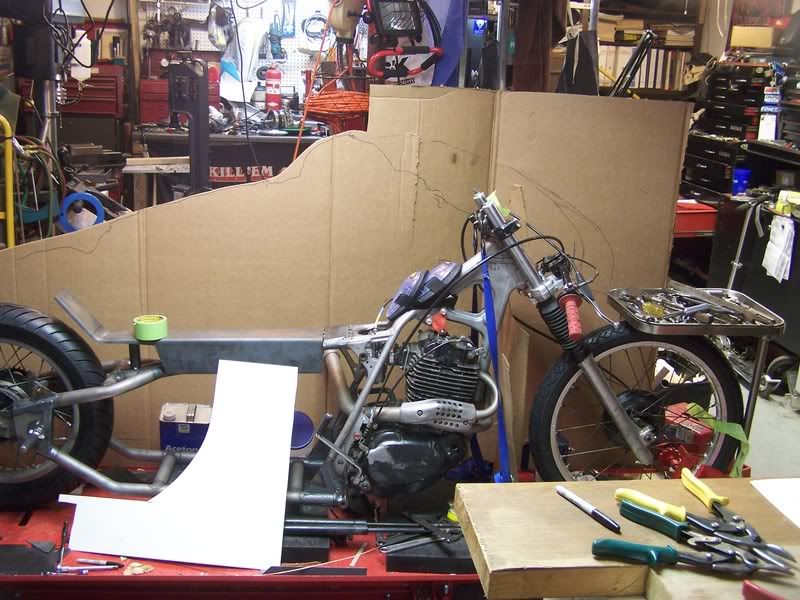
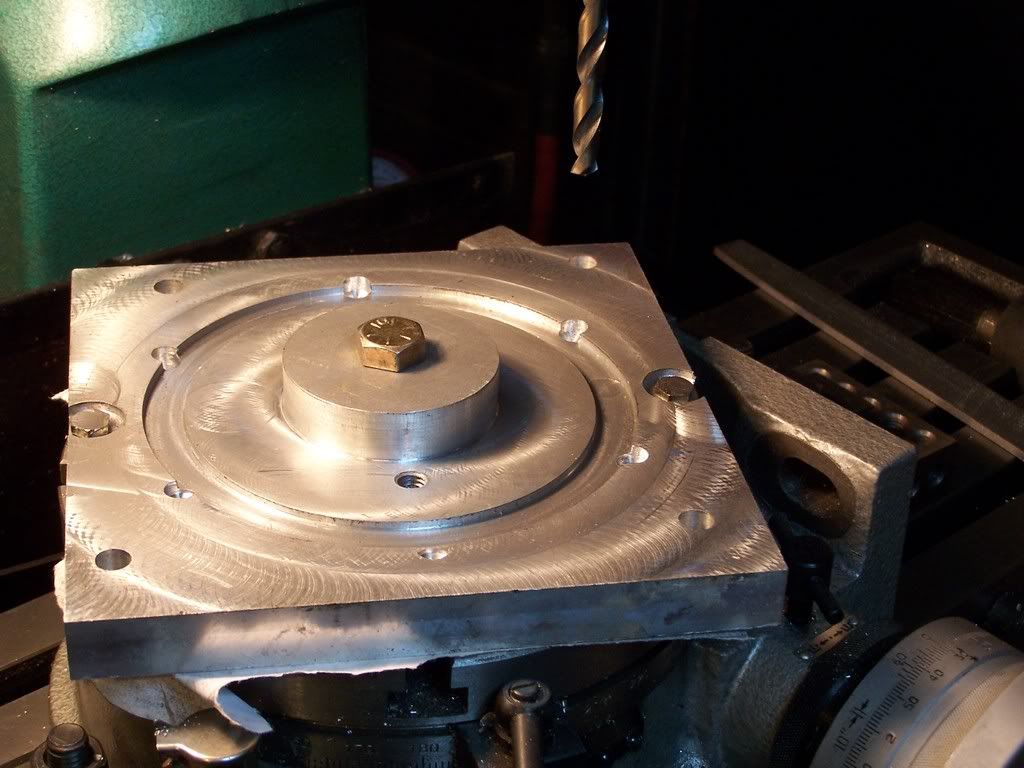
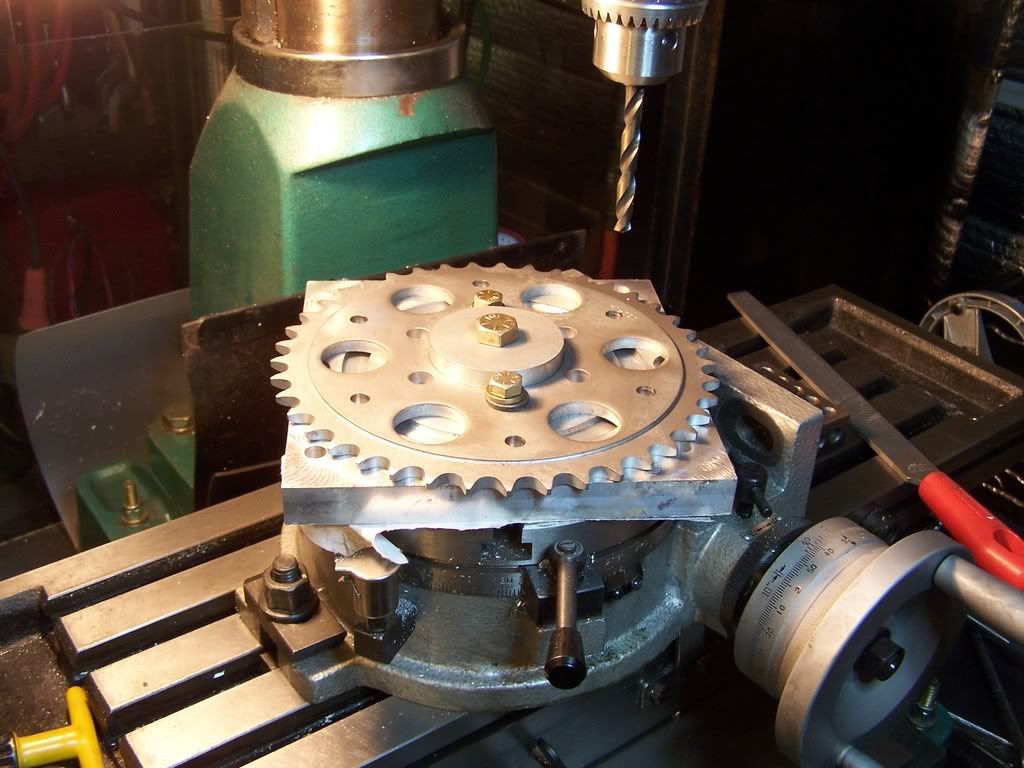
Another issue in LSR is gearing selection, and being able to change final drive ratios if needed. The XR500 is a typical dirt bike, with a large rear sprocket stock. We looked at getting another rear wheel, but in keeping with the STD philosophy we decided to make doo with what we had. This meant that we needed to get a selection of sprockets to fit the rear wheel. The smallest sprockets available for this particular wheel weren't any where near what we feel we need, and since there was already a good assortment of sprockets on hand for the red 250 Triumph we run we decided to get double duty out of them. This meant that we needed to modify the hub so that the sprockets would go onto it, and modify all the sprockets with extra bolt holes to fit the holes in the hub. No problem, we have the technology.


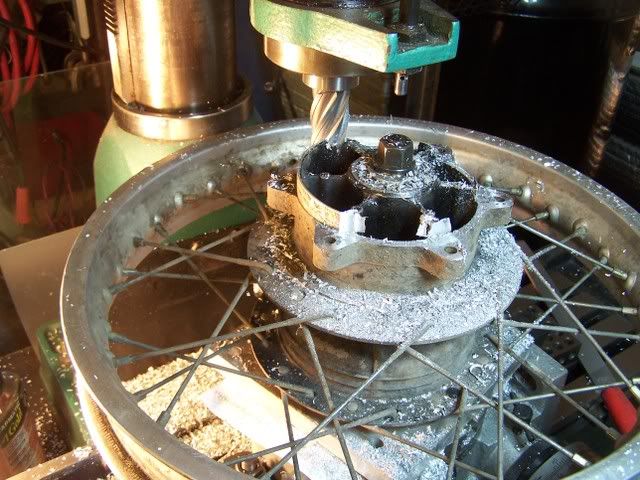
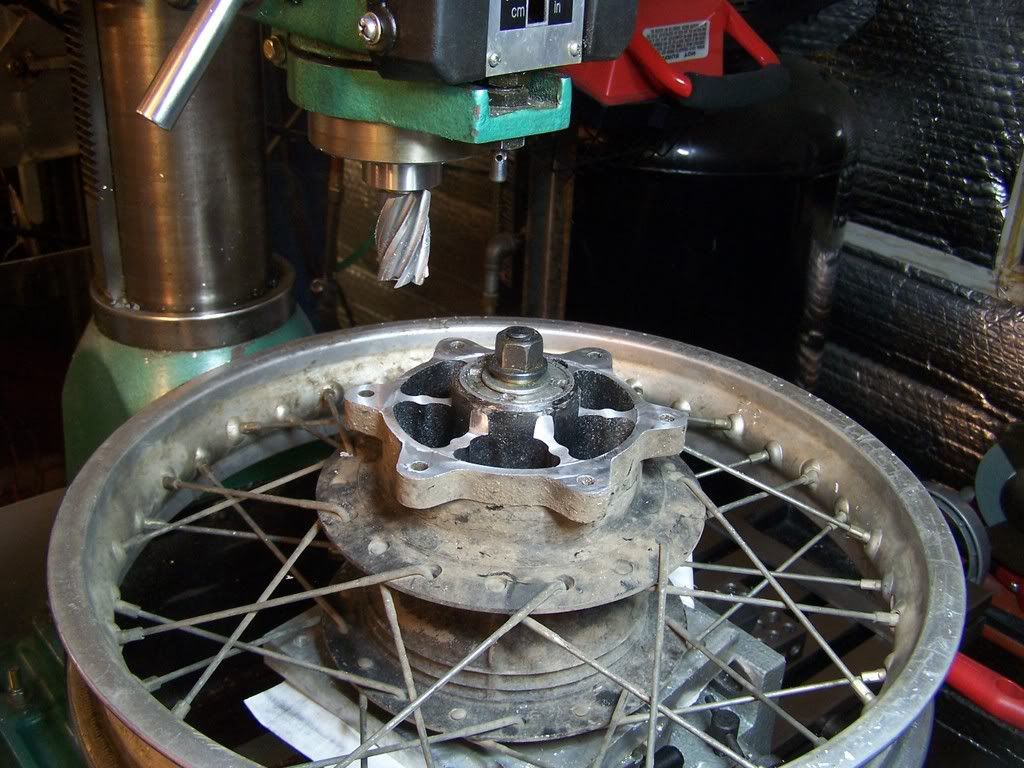
In case anyone is wondering, the actual bearing is still inside the ribbed portion of the hub. The part that I cut away for the other sprockets is only holding a preload nut and seal, so no real change was made to the structural integrity of the hub. I looked long and hard before doing that little mod
.
Decided to make the fuel tank from aluminum, just because we can. I used .040 3003 for the first one, and was real unhappy with it for a couple of reasons. First, it warped a lot from welding and looked like s**t, and second, I felt that it may be too thin to withstand vibration, resulting in cracks forming. The safety consideration sealed the deal, so I made another from .080. It looks much better and I'm happy with the strength of it now. It's also mounted on rubber isolators to help deal with the thumper vibes.
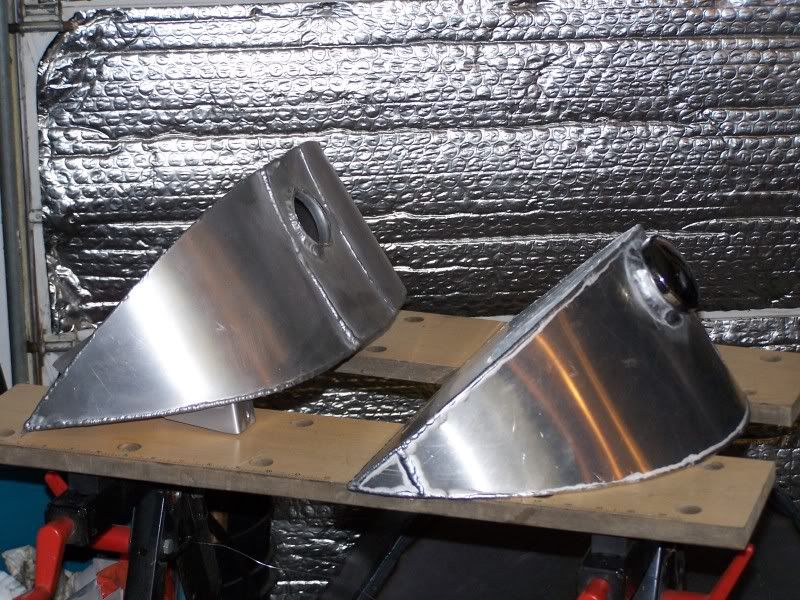
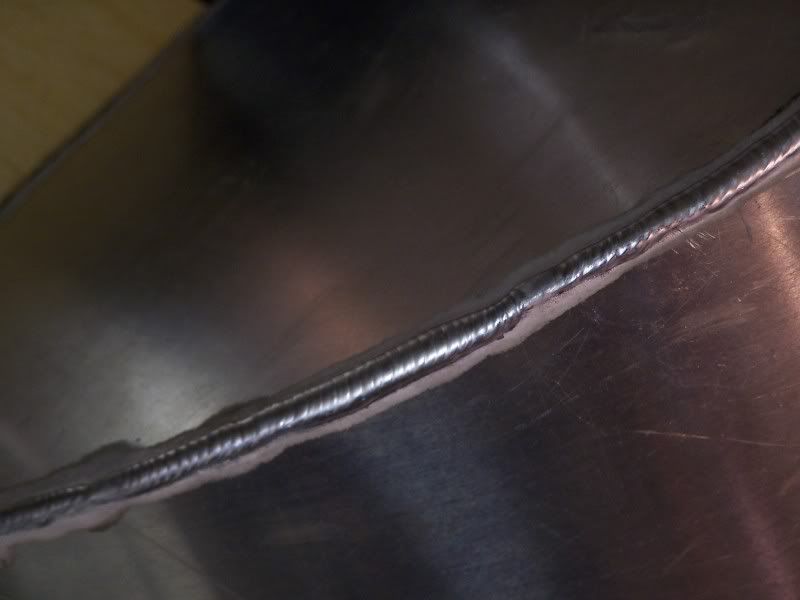
Just a close up of the weld, since I really like nice welds.
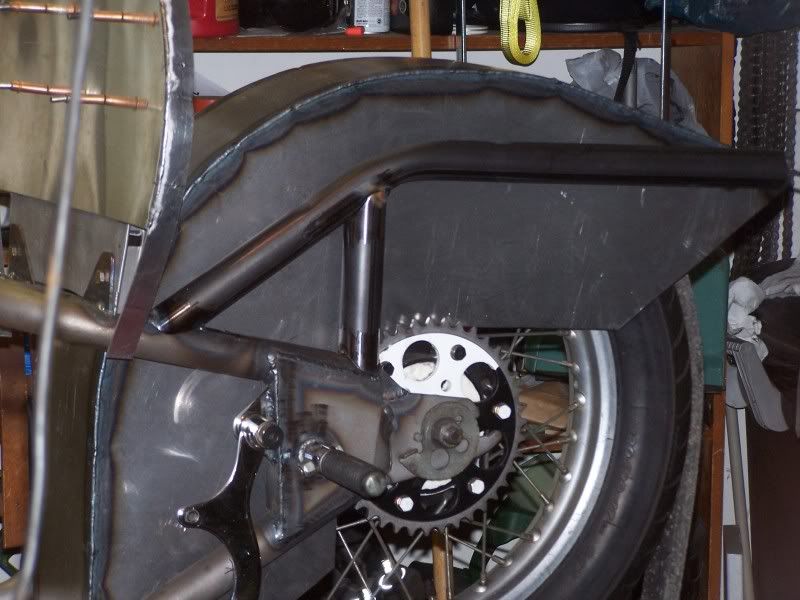
Decided we needed a substantial inner fender on the rear due to the location of the fuel tank. If something were to happen to the tire we don't want anything hitting the tank. Built from 16Ga steel. Wrapped it as close to the sprocket as we could on the left side to try to keep the salt spray away from the chain. Don't worry, in the final trim it is above the rim aft of the axle.

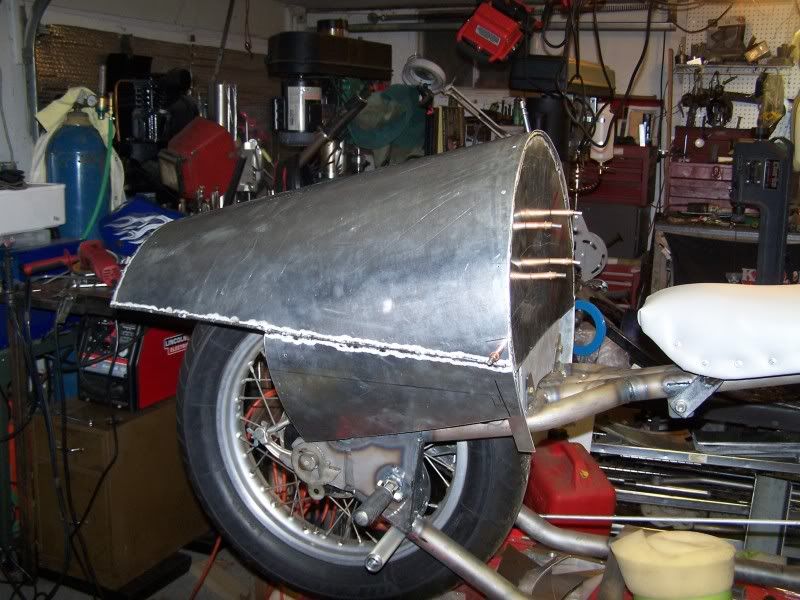
Tail fairing time. We spent a lot of time looking at other machines as far as streamlining goes. One thing that we noticed is that there are quite a few machines that have a lower fairing that flows from the front all the way to the axle (and beyond in a couple of cases that we saw

) with cutouts for the riders legs that fit very closely and have relatively sharp edges to help air flow. While this is obviously the best possible solution within the rules to streamlining this area, we decided against doing it. The reason for that decision is safety. It just looks like there is a real probability of getting a leg hung up in the fairing in the event of a get off, which would make a bad situation a whole lot worse in our opinions. What we went with is a taper on the lower part of the fairing almost all the way to the frame, making it very hard to get hung on the bike. You can clearly see it in this pic.
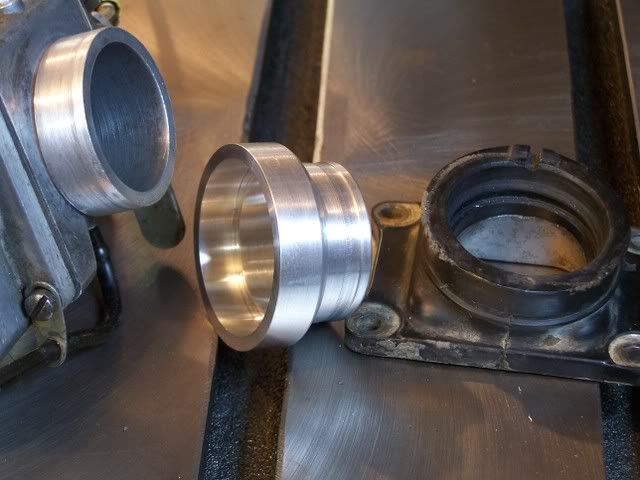
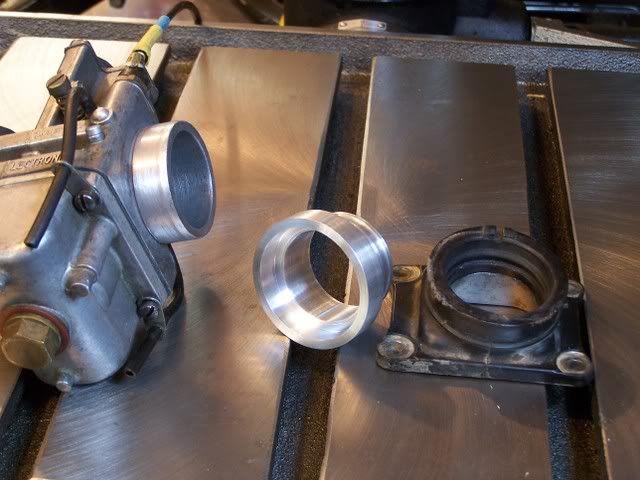
Brain came up with a swap meet special Lectron carb that he wanted to try, so an adapter had to be made to get it to fit onto the engine. He's still not sure he's going to run it, but it does seem to work fairly well in the limited test running we've been able to do so far.
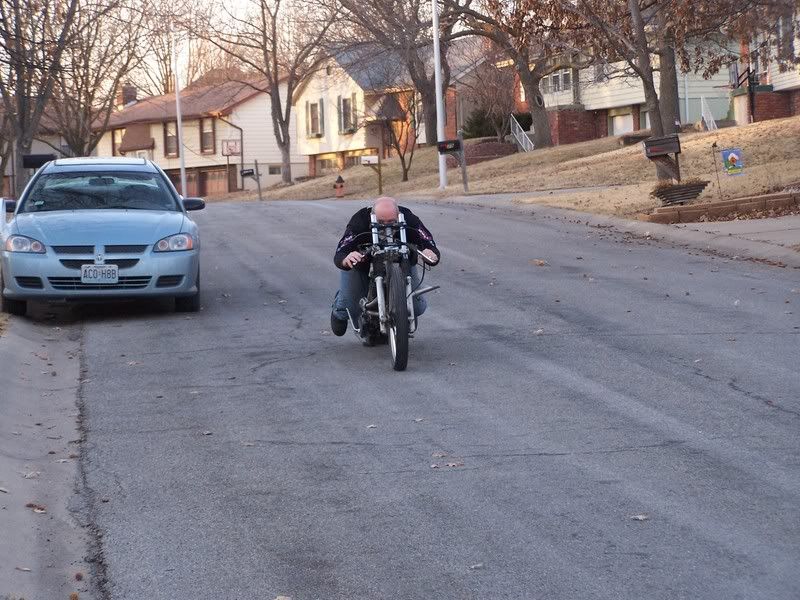
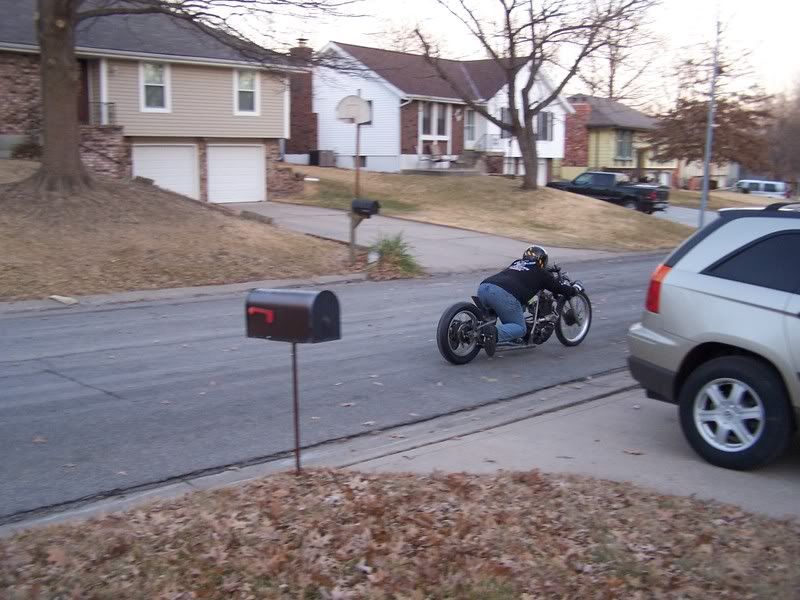
I'll end this massive post with a couple of pics of the first roll test down the street last fall. Not under power, this was just a test to make sure that Brain would be able to make the transition from stationary to moving and find the pegs and controls without trouble. Seemed like a good idea, since it would have been "not good" to finish the bike and discover it to be unridable.

CHEERS ALL, and we'll see ya on the salt.


