Author Topic: BSA B50 -500 APG Build  (Read 460886 times)

0 Members and 1 Guest are viewing this topic.

Offline Koncretekid

  • Hero Member
  • *****
  • Posts: 1203
BSA B50 -500 APG Build
« on: February 26, 2011, 07:19:48 AM »
Third Try!

After two trips to Bonneville with my B50 roadracer, I decided I wanted to build a "special construction"  bike to incorporate a couple of ideas I had.  Mainly, I wanted to get my head and helmet down where the gas tank and upper frame tubes normally live for a lower profile.  Being recently retired gave me time on my hands I didn't know was possible --- or so I thought.

So I started making drawings using an Apple program call MacDraft -- a great tool which can be terribly frustrating, especially when I get a message that says "MacDraft has unexpectedly quit," and I find that I can't reopen my drawing.  A back-up hard drive is imperative!

I tried earlier to post the drawing in PDF format with no luck.  This will be my third try.
We get too soon oldt, and too late schmart!
Life's uncertain - eat dessert first!

Offline Koncretekid

  • Hero Member
  • *****
  • Posts: 1203
Re: BSA B50 -500 APG Build
« Reply #1 on: February 26, 2011, 07:26:13 AM »
I guess my drawing isn't in the proper format.  I could try printing and scanning, but the quality won't be very good.  I'll move on to the build.  I'll try a photo here. It is the beginning of a prototype large diameter (5") headstock.  My idea is to cut a window through it.
We get too soon oldt, and too late schmart!
Life's uncertain - eat dessert first!

Offline Koncretekid

  • Hero Member
  • *****
  • Posts: 1203
Re: BSA B50 -500 APG Build
« Reply #2 on: February 26, 2011, 07:32:02 AM »
Bingo! Finally got a photo. The finished prototype is shown here.  It is mounted on Honda CB360 triple clamps, bearings and all.  Note the attractive wooden frame attachments.
We get too soon oldt, and too late schmart!
Life's uncertain - eat dessert first!

Offline Koncretekid

  • Hero Member
  • *****
  • Posts: 1203
Re: BSA B50 -500 APG Build
« Reply #3 on: February 26, 2011, 08:13:54 AM »
Fourth try.  Why are computers not intuitive.  Can't repost with same attachments, can't delete attachments.  One photo too large! I Can't seem to figure how to delete an attachment when the file is too large, so I had to reopen and will try again with only 2 photo per post.

The next step in the build process was to have a proper frame fixture. Needed to be flat and true.  I chose 5" x 2-1/2" aluminum channel, because it is dimensionally much better that steel channel, and I could make the entire fixture from one length of channel.  I trued the ends up in my mill, and had them welded together with a 1/2" plus space between them, just enough to slip a carriage bolt up from underneath for attachments.  The headstock support is made from 2" square steel tubing and is split to allow me to fab up the frame with the forks and wheel in place.  The donor bike in this case is a Honda CB360, so hubs and forks are from that. Rims are 17" aluminum laced up with SS spokes.  Honda wheel allows much better range of sprockets.  Front wheel can be fitted with disc brake if I decide I really need to stop, not on the salt. Rear axle support is 1/2" x 4" aluminum with a check milled into lower 2-1/2" (1/8" deep) for alignment.  Slot at bottom assures location anywhere along the fixture, and vertical slot is for axle. I might have actually put more holes in the side of the fixture than needed (every 2"), but who knows what I'll build next.
We get too soon oldt, and too late schmart!
Life's uncertain - eat dessert first!

Offline Koncretekid

  • Hero Member
  • *****
  • Posts: 1203
Re: BSA B50 -500 APG Build
« Reply #4 on: February 26, 2011, 08:32:17 AM »
Can I use MS word?
We get too soon oldt, and too late schmart!
Life's uncertain - eat dessert first!

Offline Koncretekid

  • Hero Member
  • *****
  • Posts: 1203
Re: BSA B50 -500 APG Build
« Reply #5 on: February 26, 2011, 08:36:16 AM »
I tried importing a MS word document, but that didn't work, either.  How to get large clear photos?

The B50 motor has to be offset 1-9/16" to the left in the frame in order to put on more than a 2 " wide tire.  Bsa designed these things originally as a 250cc and apparently didn't imagine that wider tires might be desirable.  So I needed motor mounting capability on my jig with infinite adjustability.  I made up some upstands using 1-1/2" angle slotted for 1/2" carriage bolt and fitted with a 5/8" threaded rod welded on.  At the top is another angle bolted to motor, with a 5/8" id tube welded on.  I can move the upstand anywhere on the fixture I want, and adjust the motor mount up and down.  Clamped to fixture with carriage bolt.
We get too soon oldt, and too late schmart!
Life's uncertain - eat dessert first!

Offline Geo

  • Sr. Member
  • ****
  • Posts: 563
Re: BSA B50 -500 APG Build
« Reply #6 on: February 26, 2011, 09:19:50 AM »
The drawing is great! Feels good to make the virtual bits correct before making the actual bits.

Quote
MacDraft -- a great tool which can be terribly frustrating
   Yes, they all can be.

The build jig is a slick tool!  :cheers: Good action on the setup. I'll be watching this one.

Geo

Offline Koncretekid

  • Hero Member
  • *****
  • Posts: 1203
Re: BSA B50 -500 APG Build
« Reply #7 on: February 26, 2011, 09:34:51 AM »
Thanks Geo for the encouragement.  I was getting a little frustrated with this laptop thingy that has a mind of it's own (literally). I have reformatted all of my photos to lower resolution so maybe I can get more than 2 on a post.

Here are a couple more of fixture, showing front headstock support, and motor mounted on.
We get too soon oldt, and too late schmart!
Life's uncertain - eat dessert first!

Offline Koncretekid

  • Hero Member
  • *****
  • Posts: 1203
Re: BSA B50 -500 APG Build
« Reply #8 on: February 26, 2011, 09:44:40 AM »
At this point, it was time to add some framing.  I chose wood--a lot easier to cut and "weld".  It served to allow me to test ride the thing and to find out that it was too short.  I had trouble getting my head and helmet behind the headstock.  So, I added another 6" to wheelbase which is now up to 72."  Window in the headstock, although only about 4" wide, seems quite adequate. Central tube on the Honda is about 7/8".  I am getting new triple clamps made and will only require small center bolt to pretension bearings.  I have noticed that many of the early motocross bikes had only a 3/8" bolt here, so it should work.  Maybe no center bolt at all?
We get too soon oldt, and too late schmart!
Life's uncertain - eat dessert first!

Offline Koncretekid

  • Hero Member
  • *****
  • Posts: 1203
Re: BSA B50 -500 APG Build
« Reply #9 on: February 26, 2011, 10:00:17 AM »
A few more views.  Perforated angle from the hardware store works well for trial down tubes.  I don't have the final exhaust, which will be larger and custom made, so I needed to make sure I had lots of clearance.

For the frame, I am using 1" CREW (cold rolled electric welded) mild steel.  The quality of this tubing appears very good and the weldability and ductility are good.  So I needed a tube bender.  I bought a die from Pro-Tools in Florida for a 4-1/2" radius, 120 degree bend, and fabbed up this bender from plans I found on the internet. Note how the top support angles bent from the 8 ton jack I used.  I reinforced this and all has been well.  Also, you will see the magnetic gravity type angle gauge which fits nicely on the tang on the front of the bending die, and reads to within 1 degree.
We get too soon oldt, and too late schmart!
Life's uncertain - eat dessert first!

Offline Peter Jack

  • Hero Member
  • *****
  • Posts: 3776
Re: BSA B50 -500 APG Build
« Reply #10 on: February 26, 2011, 10:07:05 AM »
The build looks great and the most recent pictures even blow up for a better view. Just for your information I opened both your drawing (very nice) and your MS Word document on my MAC. Keep going, it's looking great! :-D :-D :-D

Pete

Offline octane

  • Sr. Member
  • ****
  • Posts: 527
  • Nimbus 750 APS-VBF
Re: BSA B50 -500 APG Build
« Reply #11 on: February 26, 2011, 10:18:49 AM »
Looking good K-kid !

BSA's rule ! Got meself a couple of them.

You can take a Pdf and put it something like Photoshop or Gimp
and turn it into a Jpeg.
If you want the pics to appear here in full size you can load them to
places like Photobucket and link them to this place.

Voila:


Best of luck to you !
"A designer knows he has achieved perfection
not when there is nothing left to add
but when there is nothing left to take away"

Antoine de Saint-Exupery

Offline 38flattie

  • Hero Member
  • *****
  • Posts: 2169
    • http://www.flatcadracing.org/
Re: BSA B50 -500 APG Build
« Reply #12 on: February 26, 2011, 10:39:25 AM »
Great looking build! Love the drawings, and the use of the wood.

I'm looking forward to more updates.

With sufficient thrust, pigs fly just fine. However, this is not necessarily a good idea. It is hard to be sure where they are going to land, and it could be dangerous sitting under them as they fly overhead. -- RFC 1925

You can't make a race horse out of a pig. But if you work hard enough at it you can make a mighty fast pig. - Bob Akin

http://www.flatcadracing.org/
http://youtu.be/89rVb497_4c

Offline WhizzbangK.C.

  • Full Member
  • ***
  • Posts: 227
  • Ed Bennett, Speed Team Doo Kansas City fab shop.
Re: BSA B50 -500 APG Build
« Reply #13 on: February 26, 2011, 12:18:15 PM »


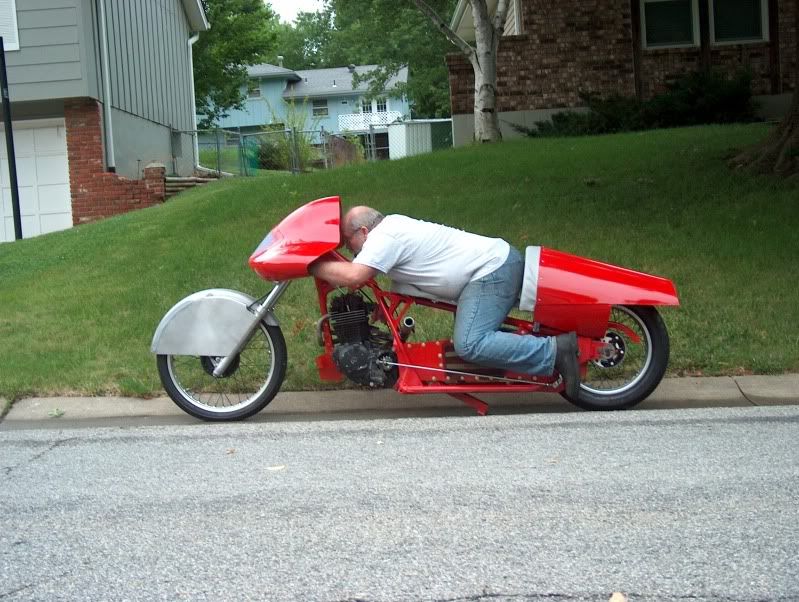
That is looking very similar to Bruin's XR500 that we built a couple of years ago. We originally planned to use a B50 for this bike, but couldn't find one that was within the budget (basically nothing, LOL). He wanted to run a big thumper so this is what he came up with. Here's a pic of it after we finished the first version build.


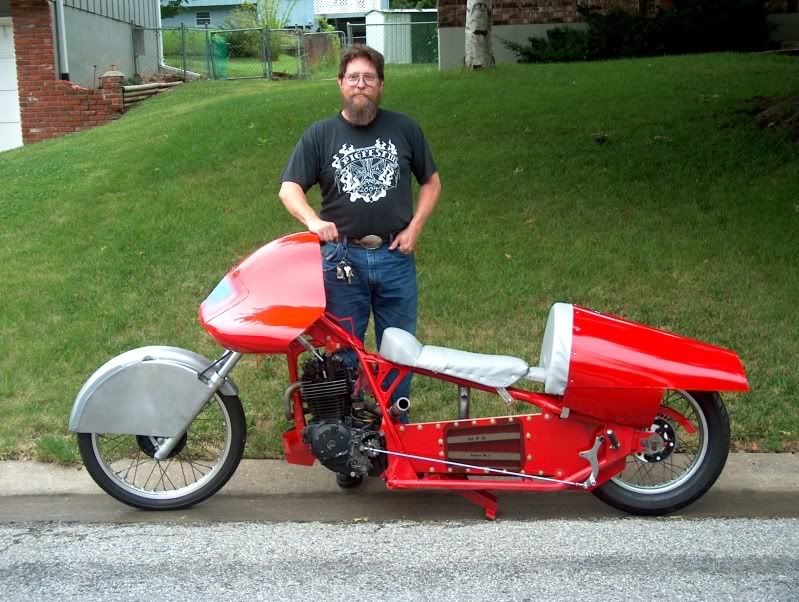
You can see from this picture that Brian's line of sight is below the top tree. We had the same concerns about this that you obviously do, and considered the possibility of needing to do something similar to your idea. However, after mocking everything up and giving it a try, we found that the stock XR500 neck disappeared when in the riding position, since the rider's eyes are looking down both sides of it. It hasn't been an issue of any kind while actually riding the bike.


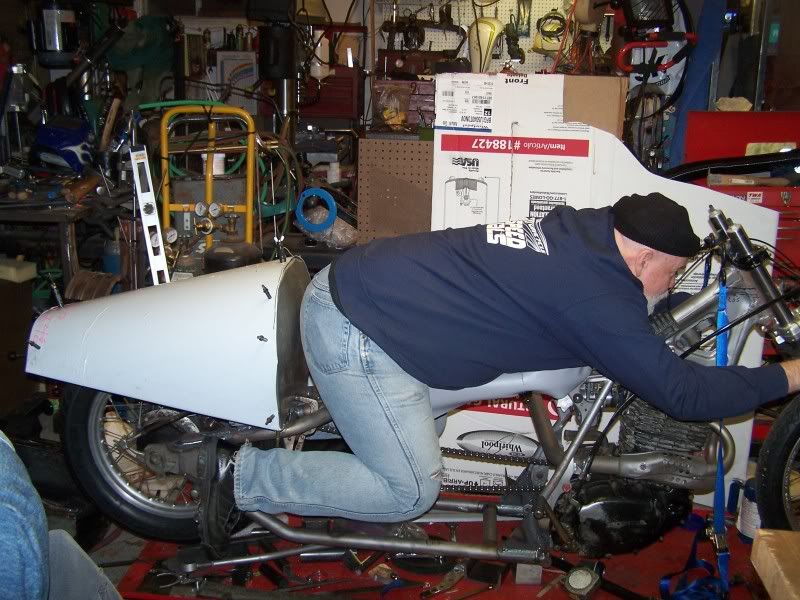
Actually, the biggest issued with this type frame design is rider comfort. In order to get fully tucked in, you end up with most of your body weight supported on the chest/stomach area. You need to make sure that weight is evenly supported and well padded, and also make provisions to eliminate impact with "the boys".  Remember that this isn't a drag race for a few seconds, you will be in this position for several minutes at a time while riding, and it can get painful very quickly, especially with a rigid rear on a rough track. Most of the changes that we made were in the rider comfort area.


As far as running a larger tire, IMO that is counter productive on a bike with this level of power, I don't believe that you'll need the wider contact patch to hook up the power that you'll be making. Moving the engine to get the chain past the tire also makes it necessary to spread the rider's knees farther out into the wind, creating extra drag. That's another of the conversations that we had in designing this bike, and so far it hasn't been any issue at all.

Are you planning to run Bub's this year? If so we'll be looking for you on the salt. We are Speed Team Doo, and run a couple of TR25 powered bikes along with the XR500. Look for us there.


Ah, this is obviously some strange usage of the word 'safe' that I wasn't previously aware of.  Douglas Adams

Offline Koncretekid

  • Hero Member
  • *****
  • Posts: 1203
Re: BSA B50 -500 APG Build
« Reply #14 on: February 26, 2011, 08:52:58 PM »
Ed (whizbanger),
I met you and other members of your team last year.  Actually spent a lot of time down at mile zero with you.

The headstock was the first part to be made.  It consists of a 5" diameter steel tube with 1/8" wall, two  1/4" end flanges, and corresponding bearing bushings. The bearings are actually 1" ID by 1.980" OD tapered roller bearings for use in trailer wheels - $12.95 for set.  I managed to get a couple of seals from All Balls Racing that should exclude the salt. Bearing bushings and flanges were welded in and then final machining was done to size the bushings for the bearings. I made up some temporary aluminum bushings which I pressed into a couple of Honda top triple clamps to use until I get new triple clamps.  Actual bearings will not be pressed into headstock until after frame is finished.
We get too soon oldt, and too late schmart!
Life's uncertain - eat dessert first!