|
jl222
|
 |
« Reply #1665 on: June 30, 2012, 06:50:24 PM » |
|
WOW! looking good can't wait to see you at Speed Week and the great speed you will do, hope I do some of your timing duties on the long course, but I bet you can set a record at the 3 mile point!
Thanks AK...hopefully we can go 5 miles someday without problems and get a great time. Got into the 2 club last year spinning through the lights on a wet track at 257+ and a data log indicated top speed of 318 before I spun. The 21/4 time was 256+. Stop by...JL222 OOPS  That 318 was for the 280 2/14 and 294 1st mile in 2010, speed should be around 270, lost data. JL222 
|
|
|
|
|
Logged
|
|
|
|
|
bvillercr
|
 |
« Reply #1666 on: July 02, 2012, 11:44:23 PM » |
|
Sunday we finished sizing our hood. This is how I fine tuned the fit.  The hardest part was getting the first two Dzus fasteners installed.  We put tape down the fender measured in about 3/4" and snapped a chalk line, then spaced out the holes accordingly and bit the bullet, these are the holes that resulted.  Now a complete install of the hood!!  Man, what a time consuming process!! We had to pinch the back spring so the Dzus would catch the spring, cut and bend most of the plates under the fenders, grind on some fiberglass.... Time to move on and start shaping the rest o the hood. 
|
|
|
|
|
Logged
|
|
|
|
|
bvillercr
|
 |
« Reply #1667 on: July 03, 2012, 11:06:25 PM » |
|
Went see my friend Robby Owens at Weco supply to look at paint colors for the car and to get an idea how much paint will cost. There are a bunch of great guys there that love hot rods, and what a small world. I'm terrible with names, but one of Robbys co-workers has many of the same aqaintences/friends as we do. He even mentioned Brad (who I have never met), but who has a Streamliner build diary on this site, called "new liner build". We traded pictures of what he is working on and his midget racer. It was a good day talking to this crew at this Fresno paint shop. 
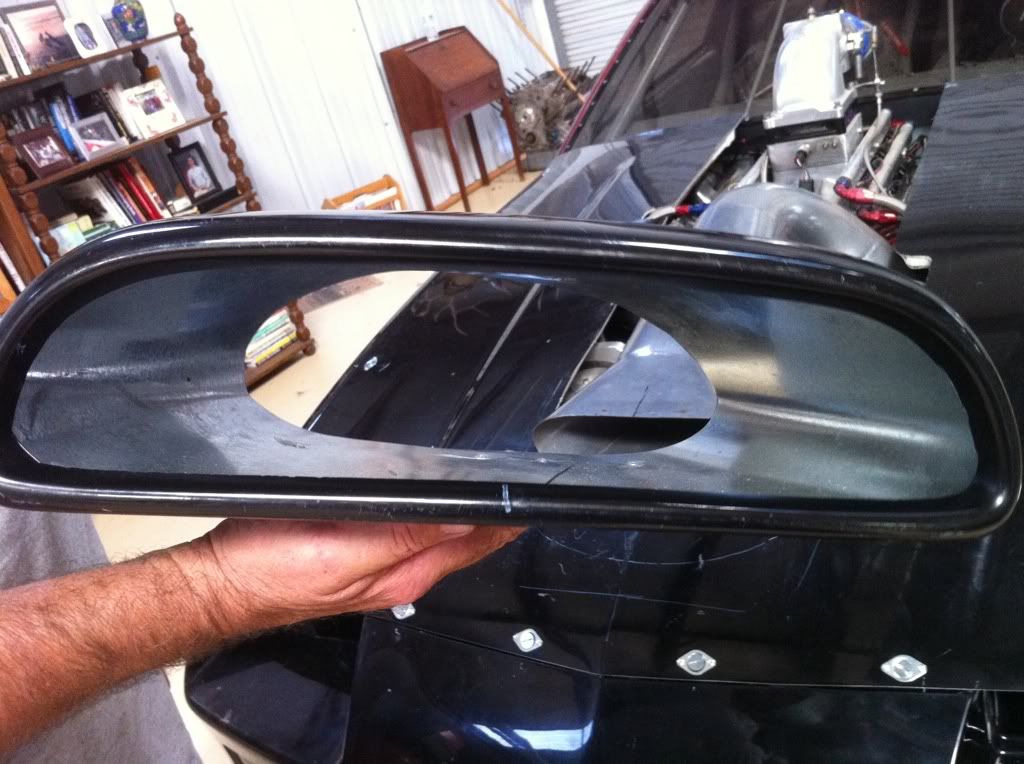
Back to this build, today was a day to get the scoop fitted with it's insert and get it mounted. Here is the tin insert we made.   
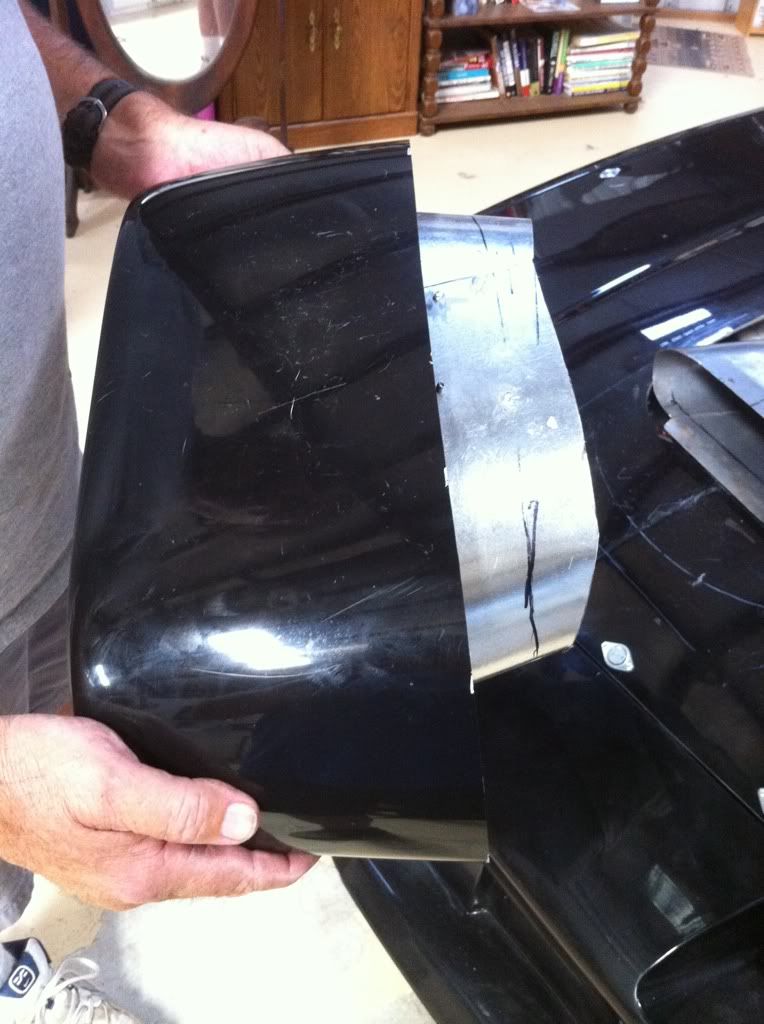
This is how it fits into the intake.  
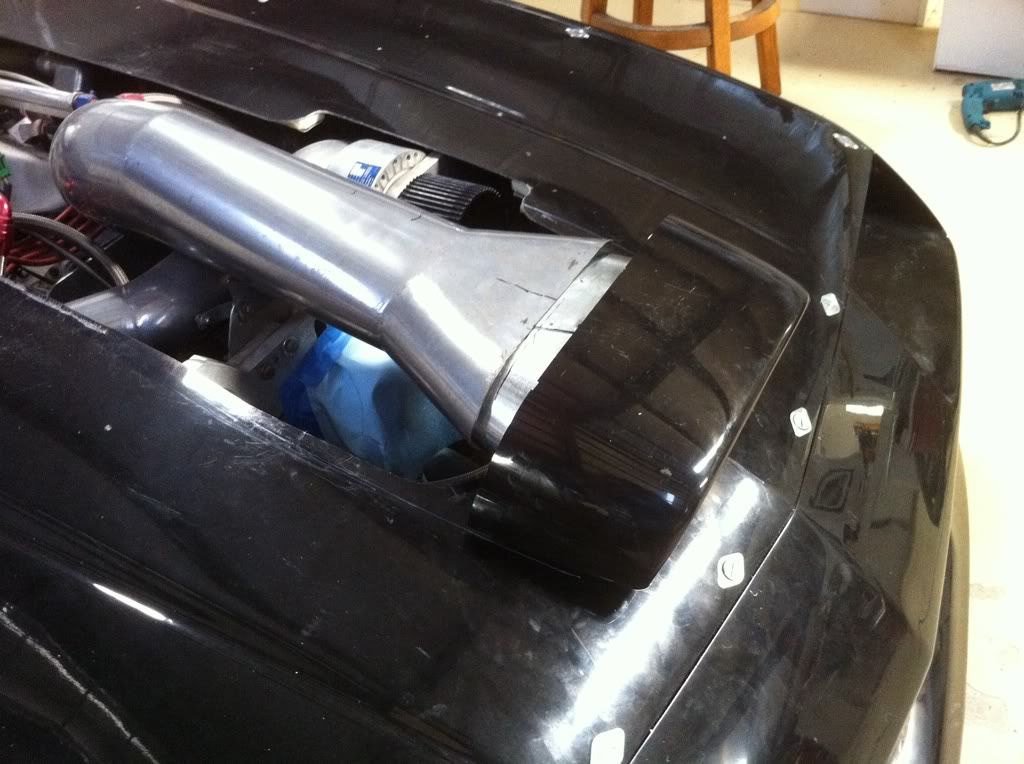
Once the air goes in, there's no escape.  
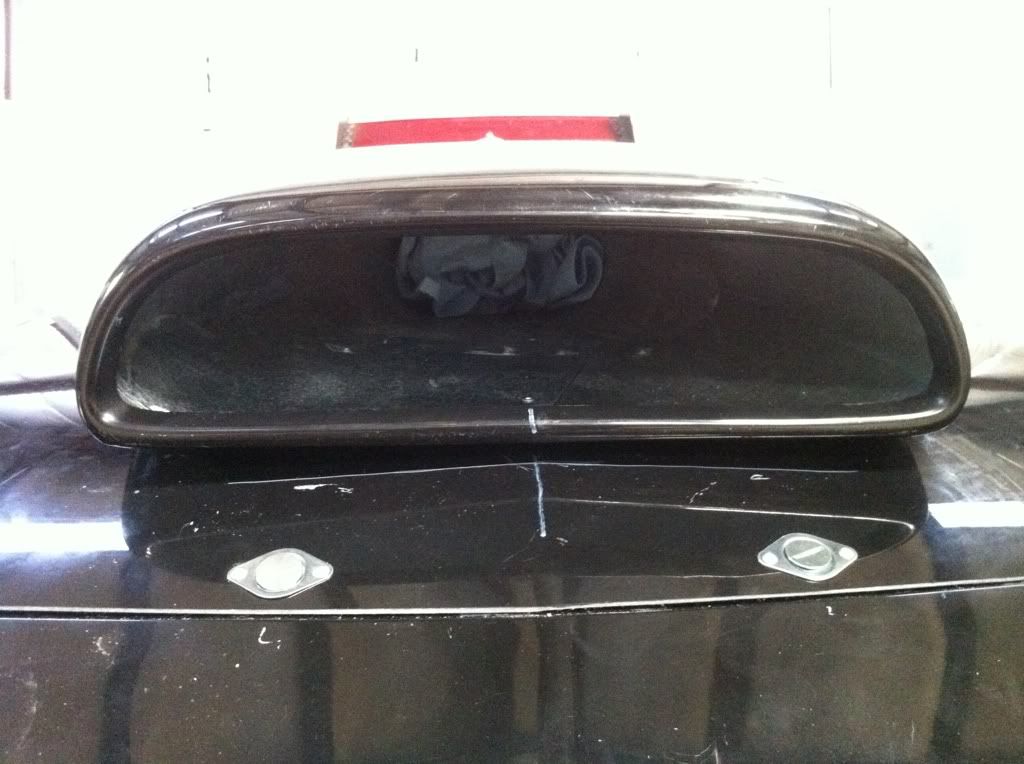
This was the tricky part.  . How do we attach it and garantee that it doesn't move? We used lots of blue tape and hoped for the best. 
|
|
|
|
|
Logged
|
|
|
|
|
jl222
|
 |
« Reply #1668 on: July 04, 2012, 12:33:06 AM » |
|
Adding to the above we taped it then pop riveted it from the bottom to keep it in the right place. All set to start covering the rest. Not much tomorrow though  JL222
|
|
|
|
|
Logged
|
|
|
|
|
bvillercr
|
 |
« Reply #1669 on: July 06, 2012, 12:37:18 AM » |
|
We started to shape the hood today, it took a lot of tinkering to get it close enough to accept. This is what we used as a beginning template.  This is the permanent piece that will eventually be shaped with round edges.  In this picture we cut some lines into the bottom side in order to give it a slight bend/curve to the top side.  Yep, this is a family adventure.  . Here we have one side cut, but it needs a little more messaging before we can attach it.  I will keep updating this process as we progress. 
|
|
|
|
|
Logged
|
|
|
|
|
bvillercr
|
 |
« Reply #1670 on: July 06, 2012, 11:24:14 PM » |
|
A lot of work but not much progress. We made some forms so we could put a little arc/curve on the top of the hood.   Then we fiberglassed the hood so it would hold it's shape.  The rest if the day we worked on getting the sides of the hood shaped to fit. Hopefully we can get the hood together on satuday. 
|
|
|
|
|
Logged
|
|
|
|
|
bvillercr
|
 |
« Reply #1671 on: July 07, 2012, 07:12:37 PM » |
|
Today we got the scoop attached to the hood, it looks like Frankensteins car right now. Tomorrow we will back fill the underside of the scoop and cloth it for stability and then the shaping begins.  We have braces and screws holding the scoop to the hood, but just to make sure it doesn't move when we turn it upside down we also fiberglassed it down.  
|
|
|
|
|
Logged
|
|
|
|
|
bvillercr
|
 |
« Reply #1672 on: July 08, 2012, 09:37:03 PM » |
|
First thing we did today was to lower the back of the hood. If you compare this photo with the others look at the Wilson intake to see the difference.  After modifying Frankenstein, we got to play with some Poly Form. This stuff has the small fiber fiberglass mix in for extra strength.  Tomorrow we will take the screws out, fill where the screw were with the poly form and fiberglass over the poly form and start sanding the outside to the curvature that we want. 
|
|
|
|
|
Logged
|
|
|
|
SPARKY
Global Moderator
Hero Member
  
Offline
Age: 70
Location: Phoenix
Posts: 3635
|
 |
« Reply #1673 on: July 08, 2012, 11:18:21 PM » |
|
Thanks for the process shots 
|
|
|
|
|
Logged
|
WORDS to build by! "--virtually the entire success of a turbo/engine system lies in thermal managemant." Corky Bell MAXIMUM BOOST
" I am a firm believer in the people. If given the truth, they can be depended upon to meet any national crisis. The great point is to bring them the real facts." A. Lincoln
agendadocumentary.com
|
|
|
|
bvillercr
|
 |
« Reply #1674 on: July 09, 2012, 09:10:47 PM » |
|
The fun job of sanding has begun.  Well.... It didn't last long, my belt on the belt sander broke and all of the spares that I brought up were all the wrong size.  I have had these extra belts for years, now I now why.  Any how, since we were done sanding we went ahead and marked the other side for tomorrows work. 
|
|
|
|
|
Logged
|
|
|
|
|
bvillercr
|
 |
« Reply #1675 on: July 11, 2012, 07:14:53 PM » |
|
We finished shaping the top edges of the hood.   No it's time to bondo the bottom curve. 
|
|
|
|
|
Logged
|
|
|
|
|
bvillercr
|
 |
« Reply #1676 on: July 11, 2012, 09:59:53 PM » |
|
We finished setting our lower curve on the hood, just some sanding tomorrow and then fiberglass to finish it up.  We also received out new rear wheels, but now we have to order shorted wheel studs. If it's not one thing it's another.  
|
|
|
|
|
Logged
|
|
|
|
Rex Schimmer
Hero Member
   
Offline
Age: 70
Location: Fulton, CA
Posts: 1475
Only time and money prevent completion!
|
 |
« Reply #1677 on: July 12, 2012, 02:18:21 PM » |
|
John and Troy, Your new hood looks great, but it looks like you will need the proverbial "three men and a boy" to lift it off of the car!! but this year you are not going to have to look at the engine! just pore in the gas and collect those 300 mph timing slips!!!
See you at the salt! Rex
|
|
|
|
|
Logged
|
Rex
Not much matters and the rest doesn't matter at all.
|
|
|
|
jl222
|
 |
« Reply #1678 on: July 12, 2012, 11:23:11 PM » |
|
John and Troy, Your new hood looks great, but it looks like you will need the proverbial "three men and a boy" to lift it off of the car!! but this year you are not going to have to look at the engine! just pore in the gas and collect those 300 mph timing slips!!!
See you at the salt! Rex
Yeah...we always think 300 slip, but salt happens  Hood is getting heavier every day, plywood is 3/16'' but over a gallon of bondo and resin so far. No heavier than old hood, which almost got blown off top of car when I whacked the throttle  We finished sanding and got a coat of resin on today. Then after the 1st coat dryed we were going to cut the fiberglass to fit, tape it down on the sides and give it another coat. But it was still tacky. Beer time untill tomorrow  Also contacted a painter that lives near me and will come out Sunday to have a look. Troy took pics and will post later. I think. JL222
|
|
|
|
« Last Edit: July 12, 2012, 11:25:11 PM by jl222 »
|
Logged
|
|
|
|
|
bvillercr
|
 |
« Reply #1679 on: July 12, 2012, 11:32:09 PM » |
|
We got the bottom curve sanded and ready for fiberglass.  The next step was to get some resin on the hood and let it dry for the next step.  The next step you have heard from above.
|
|
|
|
|
Logged
|
|
|
|
|