Author Topic: Raised port Stude heads  (Read 57011 times)

0 Members and 1 Guest are viewing this topic.

Offline zenndog

  • Full Member
  • ***
  • Posts: 243
Re: Raised port Stude heads
« Reply #75 on: November 26, 2011, 01:44:49 PM »
Stan- I wondered the same thing. Seems a little funky. I am certain someone may chime in who knows better.

Offline zenndog

  • Full Member
  • ***
  • Posts: 243
Re: Raised port Stude heads
« Reply #76 on: November 26, 2011, 08:25:11 PM »
Here are some albums by Mike on the racing Sudebakers forum showing his Studebaker port work which has been done in a very methodical way

http://public.fotki.com/-Mike-/stude_head/

http://public.fotki.com/-Mike-/050-intake-move-porting/

http://public.fotki.com/-Mike-/white-paper-photos/

Here is a thread on porting and flowing an R3 head? This thread is also very informative

http://www.racingstudebakers.com/foo...php?f=9&t=2261

Online Jack Gifford

  • Hero Member
  • *****
  • Posts: 1569
Re: Raised port Stude heads
« Reply #77 on: November 27, 2011, 12:24:07 AM »
In what way does the pressure variable affect (or not) the CFM readings?
Darn near a linear relationship. Flow values should always specify the pressure differential; however, 28 inches-water is almost universally used these days.
M/T Pontiac hemi guru
F/BFL 1-mile Loring record 2020

Offline zenndog

  • Full Member
  • ***
  • Posts: 243
Re: Raised port Stude heads
« Reply #78 on: November 27, 2011, 05:20:23 AM »
Trying to port, realize that I need to get some more tools, specifically the longer ones. Either way, here it goes. These are rough still.
Jack’s intake so far, two pics


Notice the difference in the top of the port, two pics


Looking down the intake


The intake and exhaust seats, Mikes pictures helped show where I might want to go and also how far I am still falling short, and needing much, much more practice


In one of the pics of the intake port above you can see the lip behind the valve seat, I filled it with JB Weld for the flow test.


That is all for now.

From the pics of the port that I cut the top off of I want to point out that instead, even preferable to, cutting off the top of the port, another route might be to fill the valley between the two pushrod holes with weld as well as the little "gap" above the intake ports ( below the valve cover gasket ) and port the intake as high as I have here. Then you could machine the weld above the intake ports flat and make your own intake. Does that make sense?

Offline zenndog

  • Full Member
  • ***
  • Posts: 243
Re: Raised port Stude heads
« Reply #79 on: February 26, 2012, 12:41:36 AM »
Long Awaited.....perhaps

Here we go. Well....in my mind today was a very straight forward cut a step around the ports, fit the aluminum block, and tap some screws to hold the aluminum block in place kind of day.

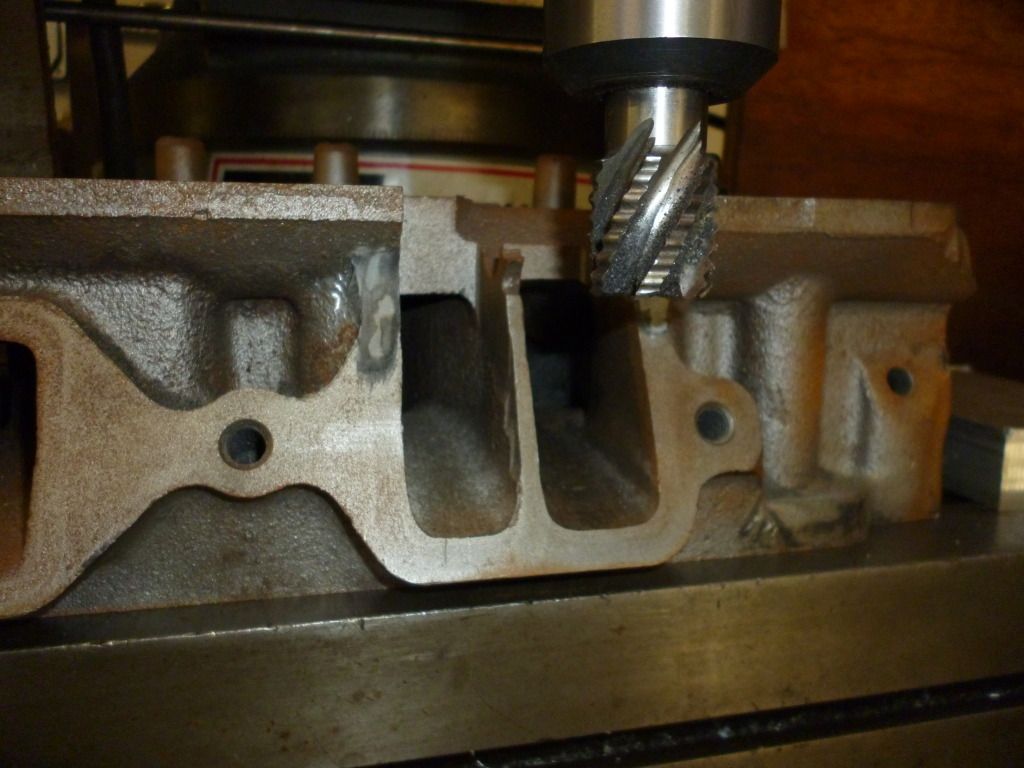
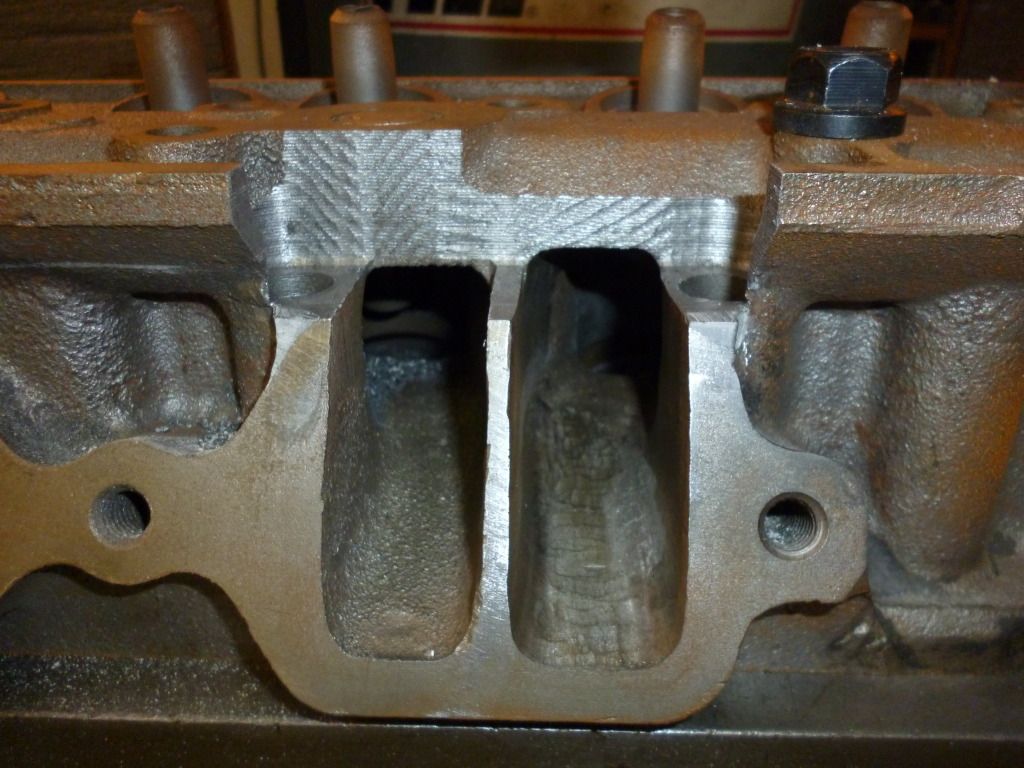
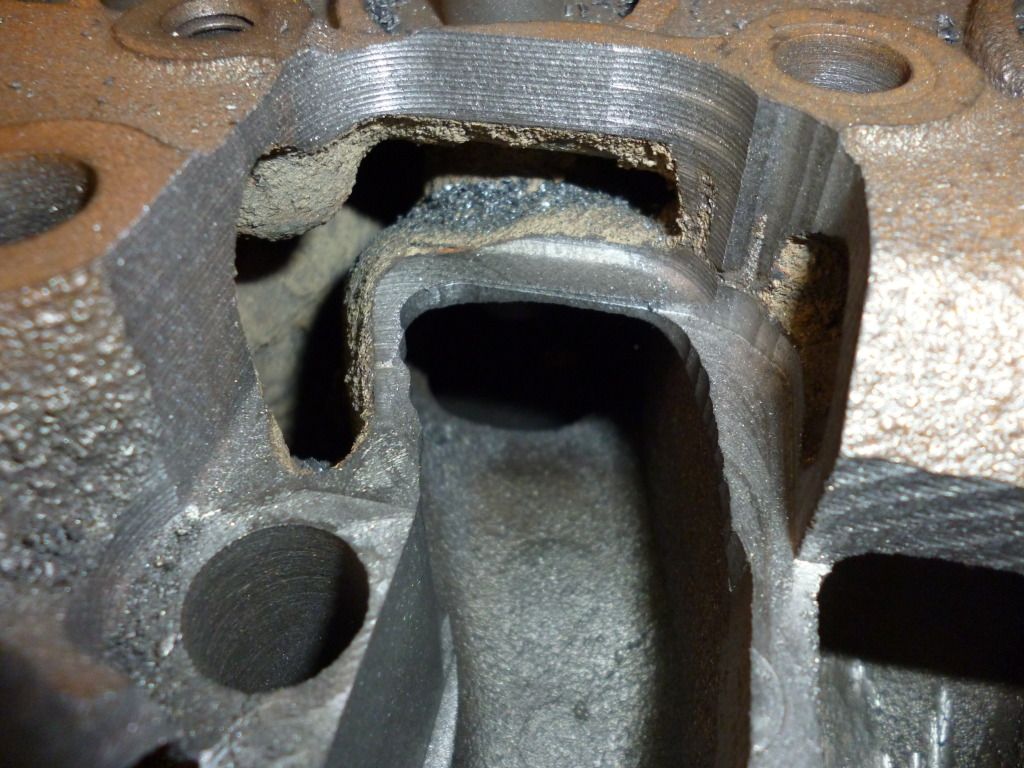
Started off like this


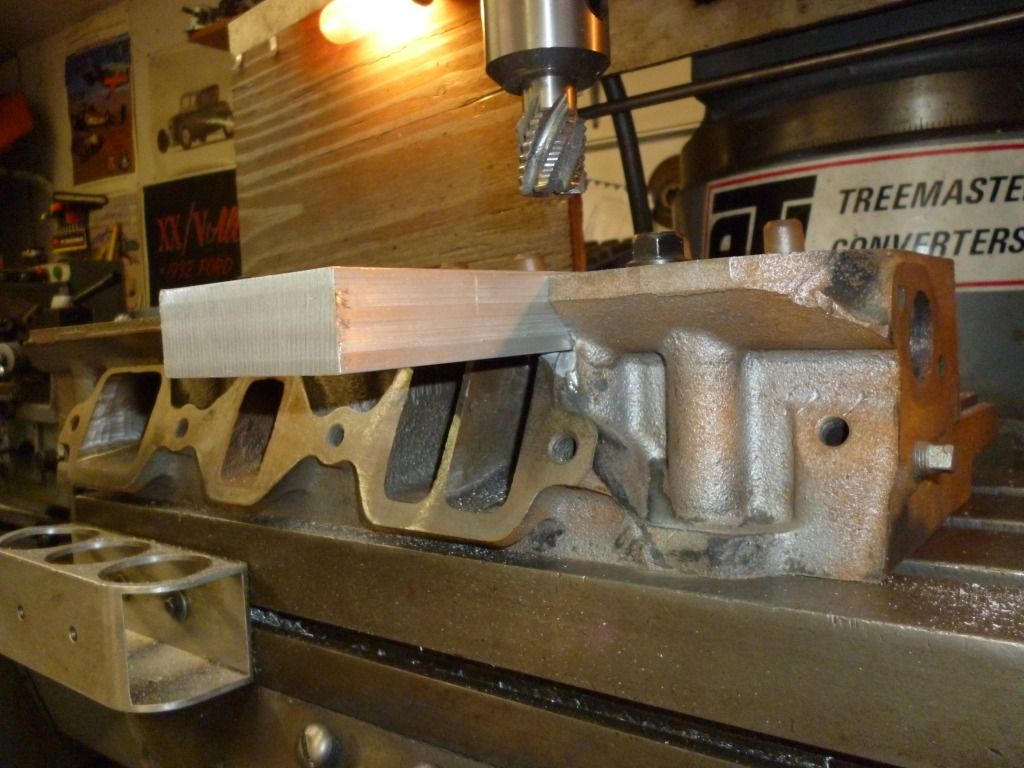
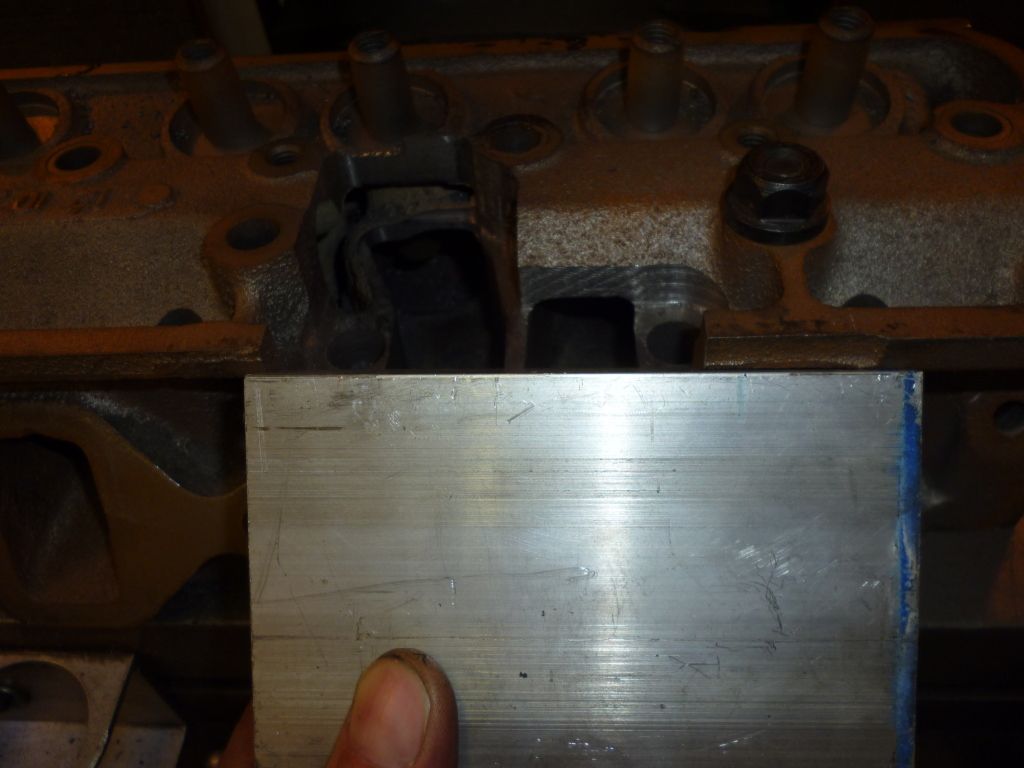
Block fits, so far so good


Little more milling....


Nice!


Another view


Good right? Well Rich came over from working on his 26 Dodge engine and we talked a little about the head. I mentioned that I wished I could push it a little farther.....to try to get over the valve more. Rich said, just do it on one of the ports, it is now or when?

Point taken


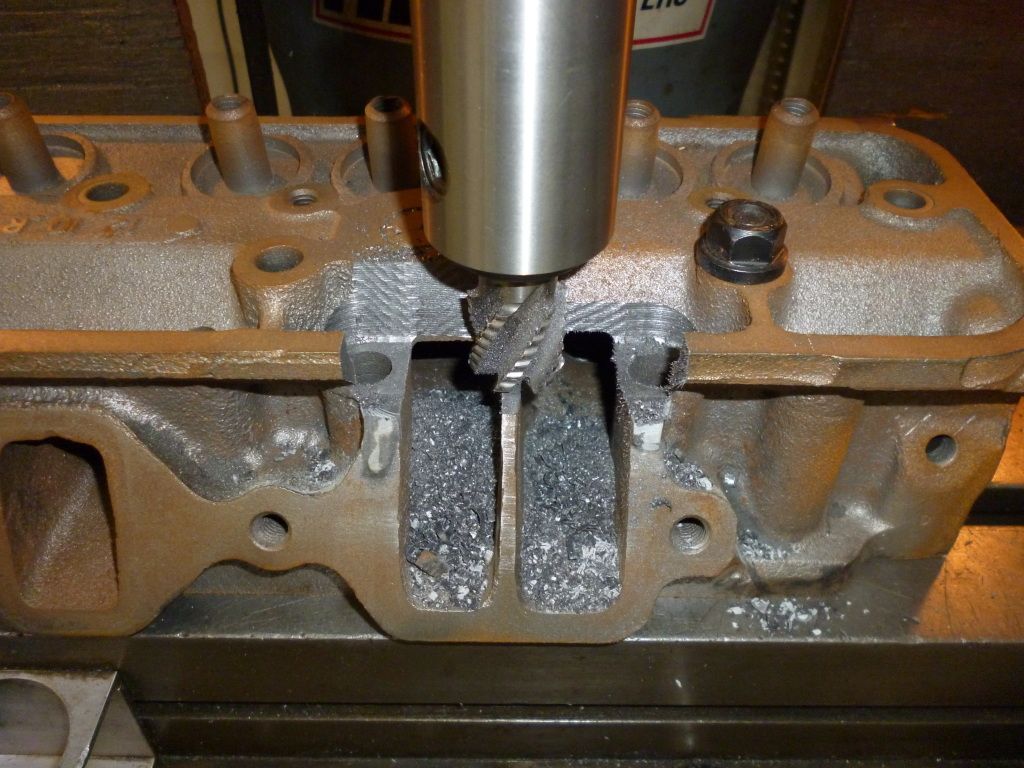
New end mill in mill, cut on sir, cut on


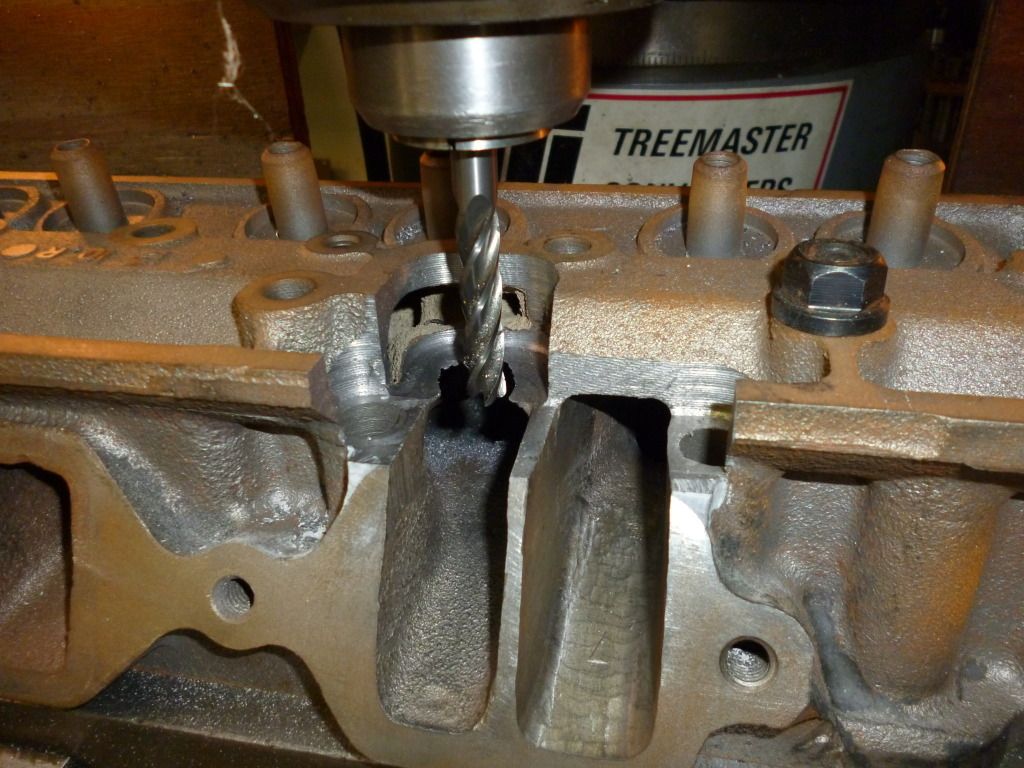
At around this point I started forming the notion that if actually doing this modification to a head to run, the block would go longways, and probably incorporate the rocker shaft monut/headbolts. This block wasn't long enough and I decided to keep it "simple" ( :lol:, simple..yeah right ).


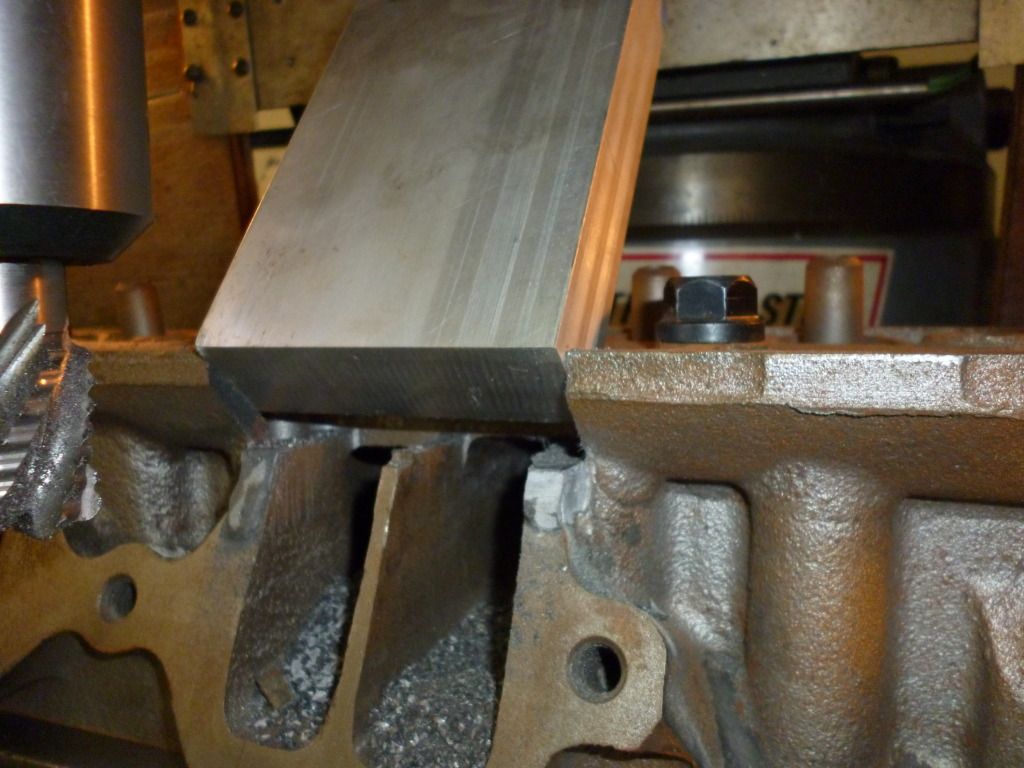
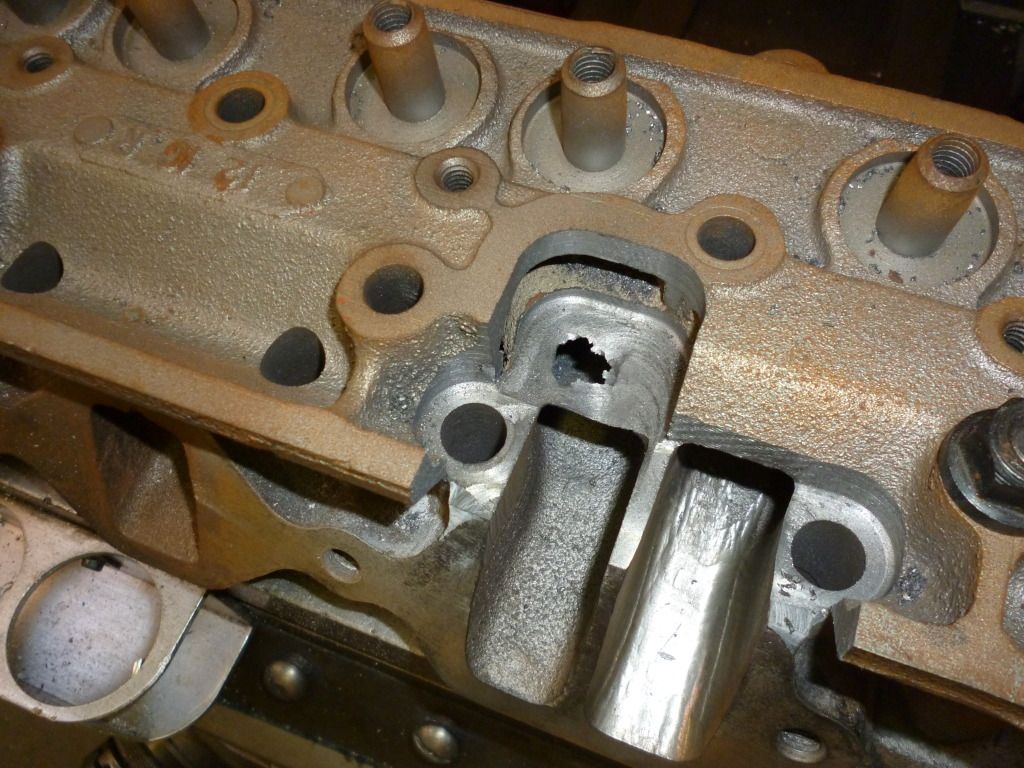
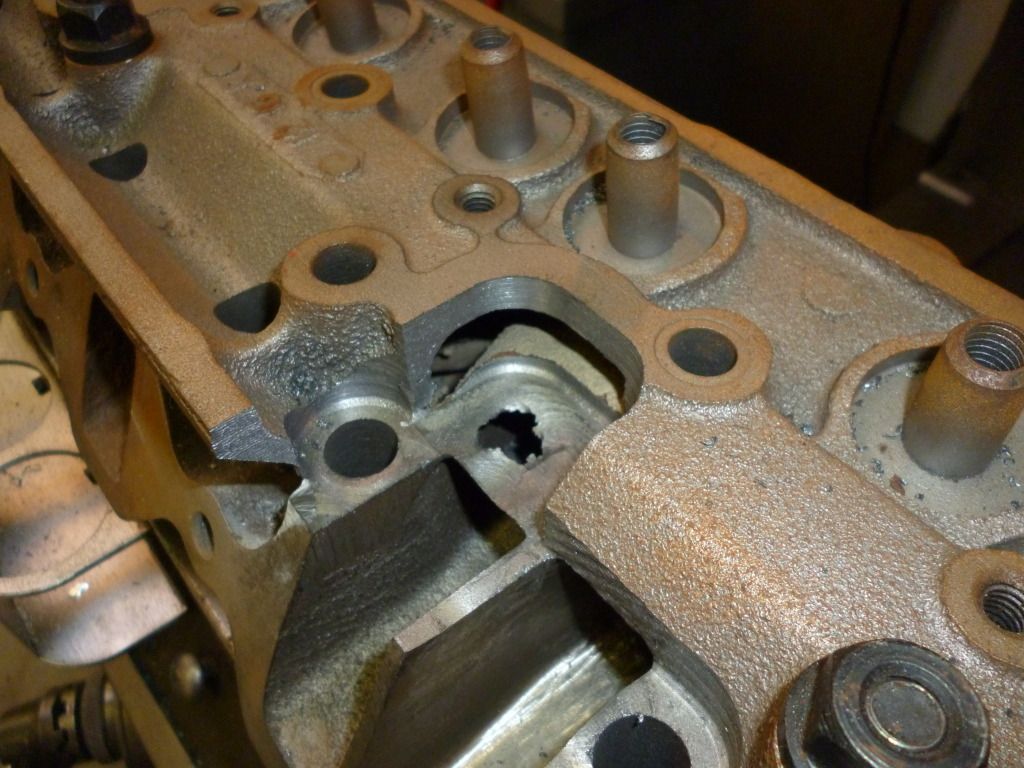
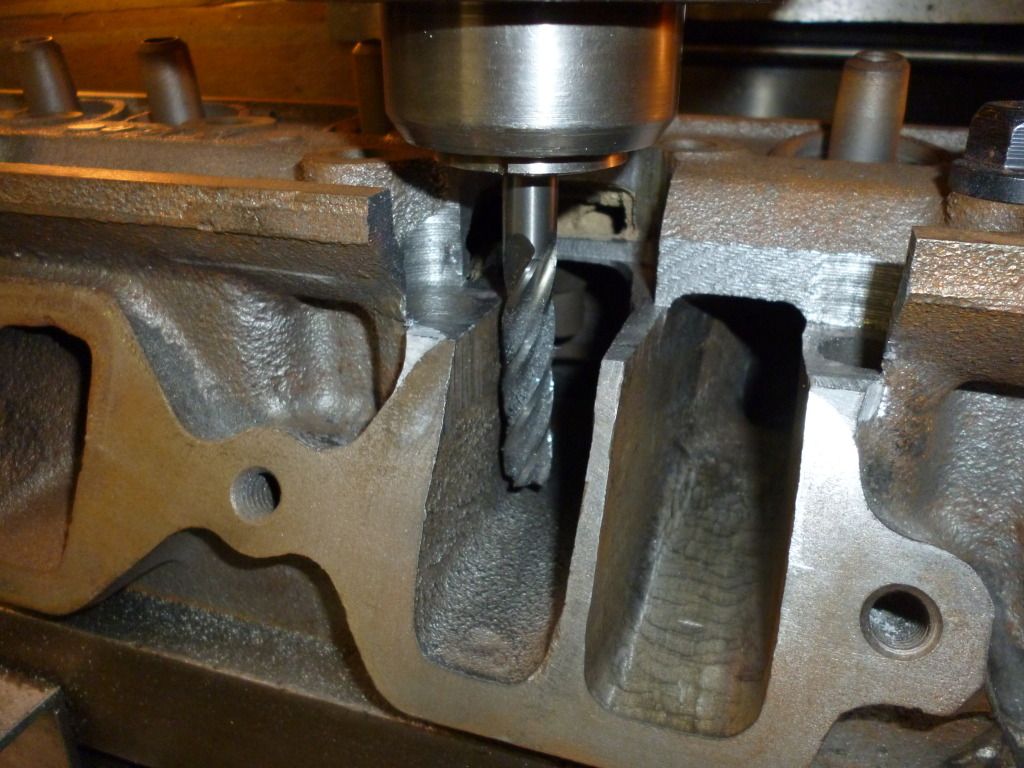
More cutting, the cut is moving farther back toward the valve


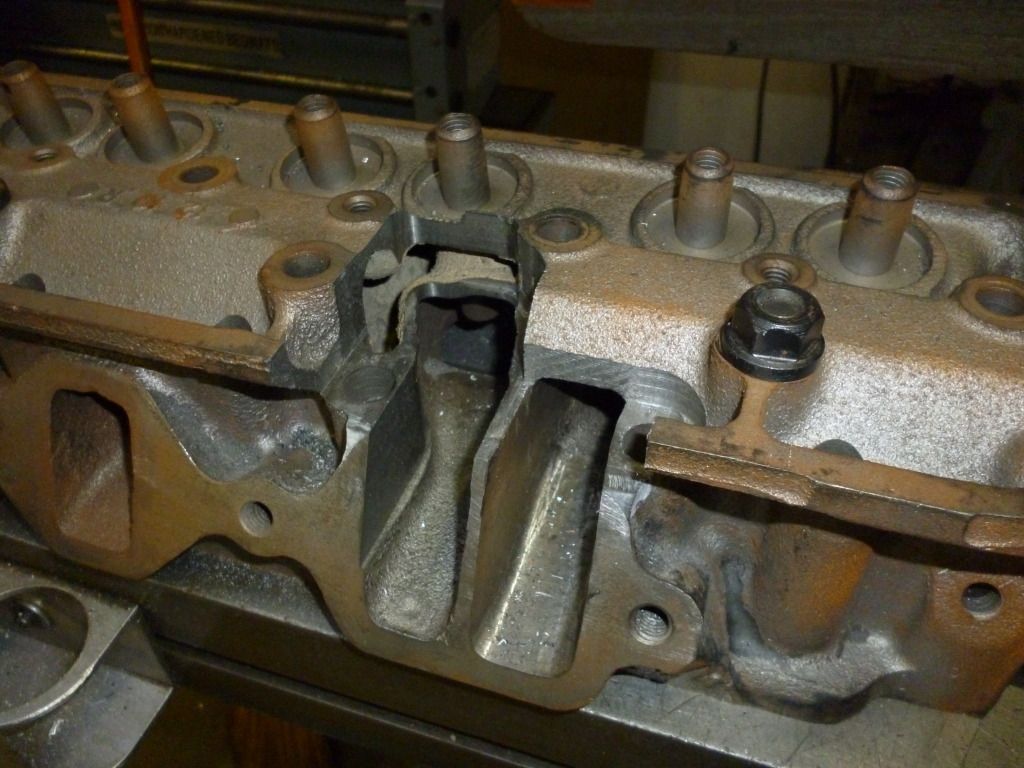
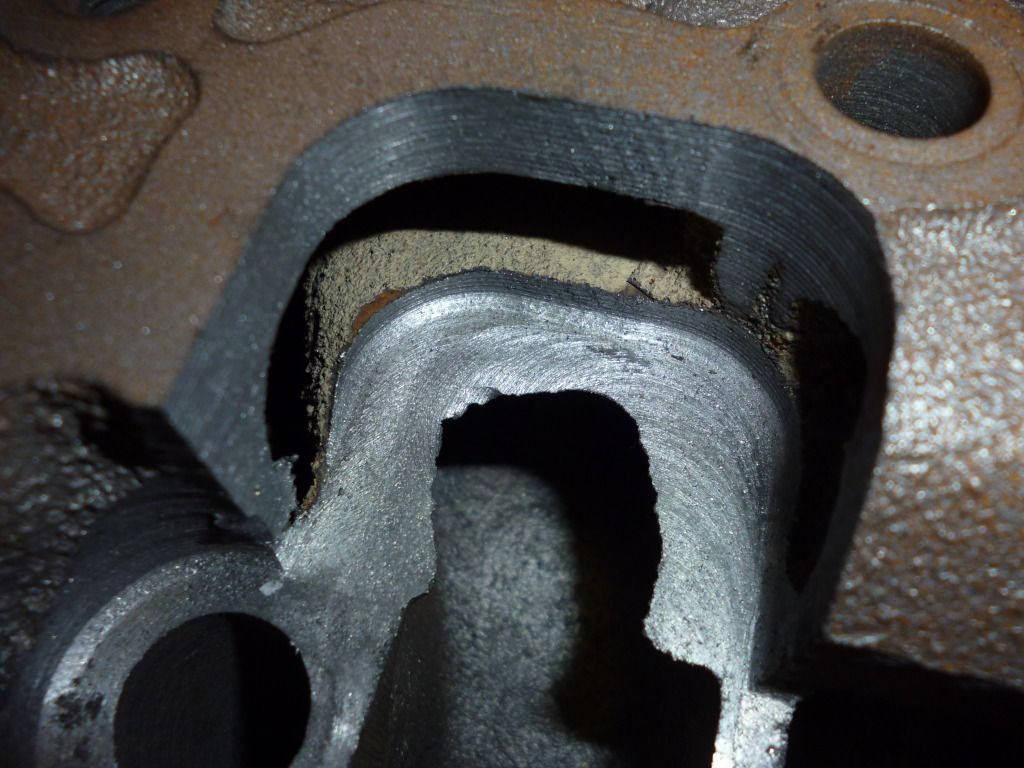
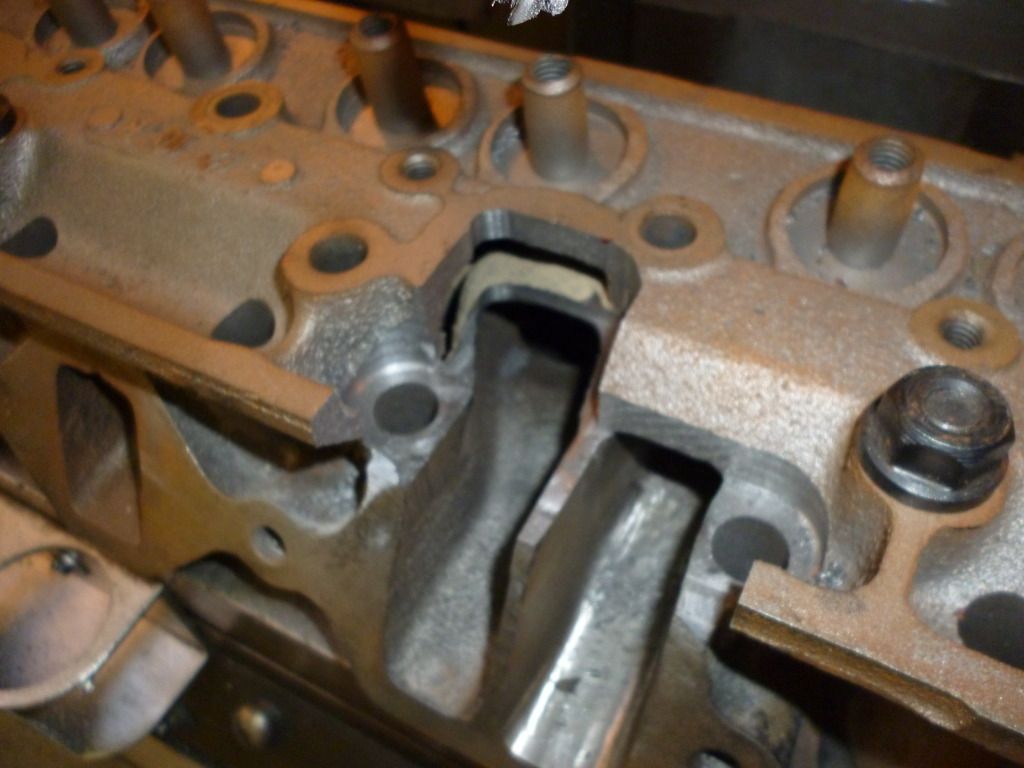
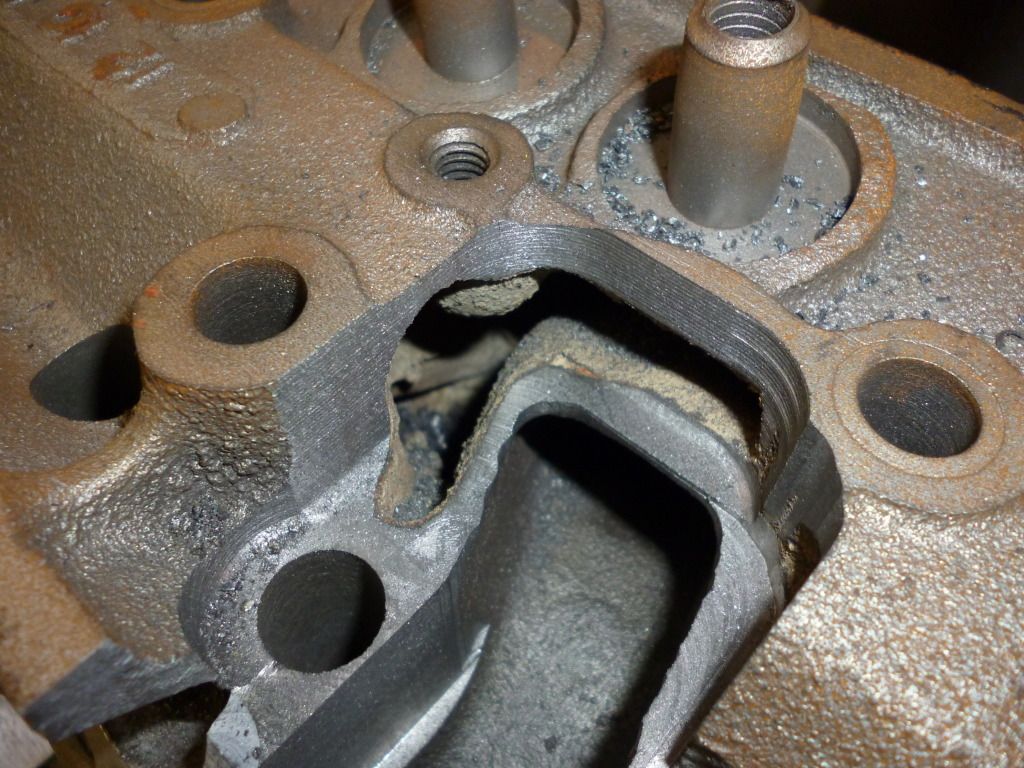
That is as far as I could move it, the spring pad is right there now, and I think some guys here are cutting larger spring pads for their valves so they can use larger springs right?

I machined the aluminum block to fit, needs just a little more.


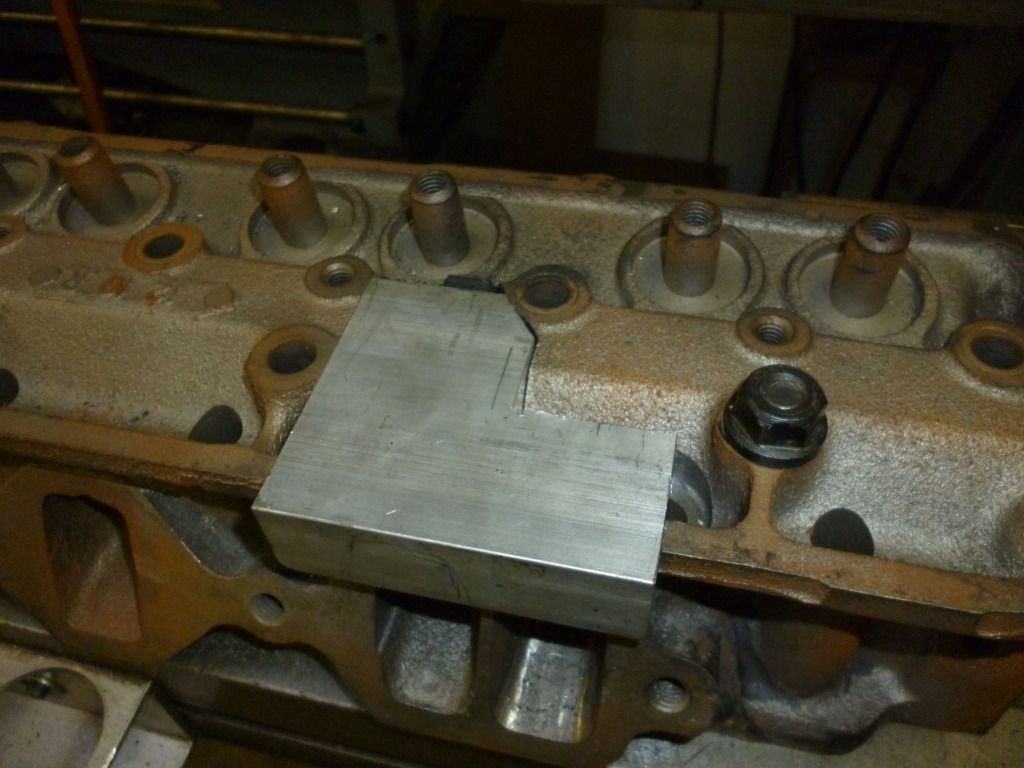
That is it for now. May be a week or two before more updates.

Offline Tman

  • Hero Member
  • *****
  • Posts: 3672
Re: Raised port Stude heads
« Reply #80 on: February 26, 2012, 12:57:37 AM »
You guys are nuts.............in a good way!

Offline zenndog

  • Full Member
  • ***
  • Posts: 243
Re: Raised port Stude heads
« Reply #81 on: February 26, 2012, 01:08:08 AM »
This is mainly an expirement

I am not certain I would do this to a head for a car unless the flow results are just fantastic. I would also do it a little differently, but it is nice to be able to let go of the restraints and just push the limits.

I am not so happy with how the intake is coming out. My fantasy would be to have a view if the valve like on the exhaust side. So far the angle is wrong, I am going to do some JB Welding, trimm the aluminum block some more to get it to fit all the way back against the spring pad, and then see if I can get the angle ground to were there is a smooth transition at least.

Pictures explain better:

INTAKE


EXHAUST


Offline Milwaukee Midget

  • Global Moderator
  • Hero Member
  • ***
  • Posts: 6663
    • Milwaukee Midget Racing
Re: Raised port Stude heads
« Reply #82 on: February 26, 2012, 01:13:16 AM »
You've asked, and are pursuing an answer to a question I would have never had asked, and I am finding it fascinating.

Thanks for sharing this!
"Problems are almost always a sign of progress."  Harold Bettes
Well, I guess we're making a LOT of progress . . .  :roll:

Offline Peter Jack

  • Hero Member
  • *****
  • Posts: 3776
Re: Raised port Stude heads
« Reply #83 on: February 26, 2012, 01:56:51 AM »
I'm just curious and we know what that did to the cat, but wouldn't you be better using a steel plate rather than aluminum in a real world application or even cast iron if you could acquire it? I'm thinking of the coefficient of expansion which is just about double for aluminum over cast iron. I know the drag racers have used aluminum for similar applications but their engines run for such short durations and minor leaks don't seem to matter to them particularly.

Pete
« Last Edit: February 26, 2012, 02:00:41 AM by Peter Jack »

Offline zenndog

  • Full Member
  • ***
  • Posts: 243
Re: Raised port Stude heads
« Reply #84 on: February 26, 2012, 10:34:35 AM »
Cast iron "billets" are available

this is an experiment

I didn't want to fork out for the cast iron, although it is easy to cut.

I had the aluminum for free. And it is easy to cut as well

There are a couple of milder mods that I surpassed, since this is a test of how far it can go, at least in my mind.

If the resulting port shows some very, very promising flow numbers. A big if. And I decided I wanted to actually try to make a pair ( :-o ) of heads to run on an engine, in the least the plate would probably be large enough to be bolted under the three head bolts around the ports. One on eache side and the one in the center towards the middle of the head.

Look how thin the port walls are. The guys who ran the Buick straight 8 used wonder bread and epoxy to build up the areas where they went through water jackets, then they machined again and epoxied in new intakes. I think in the least some work along those lines would be needed around the back of the intake around the valve. I am thinking about filling the "pocket under the spring pad with epoxy because I want to raise the top of the port a little.

I have divorced myself from "feasible" and just want to finish this and see what happens. It just needs to have a port that will hold up for testing on a flow bench. The ideas about how to make it work are for another day if the results warrant going forward.

 
« Last Edit: February 26, 2012, 10:48:14 AM by zenndog »

Offline zenndog

  • Full Member
  • ***
  • Posts: 243
Re: Raised port Stude heads
« Reply #85 on: February 27, 2012, 10:04:23 PM »
Found some time to tinker today

First off, here is the valve angle, hardly scientific with my $10 angle gauge but......


Looking down the port before starting. I finally pulled out my carbide bits with the 6" shafts, the one I think I needed to use the most was bent and useless, but onward we go


I took a minute and trimmed the back of the aluminum block to fit into the cutout area of the head snug


I ground off the guide and shaped the top of the port the way I want it to be headed when it meets the part of the port that will be in the aluminum block. here is a view looking down the port


Then I placed the aluminum in the head and sprayed some primer in the port to mark roughly the area I will need to cut out on the next visit to the mill


I simply wiped the primer out of the port with a rag, here is a view with the painted block in place


It was a little disappointing that the small "pinecone" carbide pit was bent, but I will do some work during the week with the other bits which seem to work fine.

Offline zenndog

  • Full Member
  • ***
  • Posts: 243
Re: Raised port Stude heads
« Reply #86 on: February 28, 2012, 11:15:33 PM »
Just went out and took these pics. I will need to fill again as it sank in.


The nice thing is that since the JB Weld was still a little soft I could take a plastic razor and clean the machined surfaces

Offline zenndog

  • Full Member
  • ***
  • Posts: 243
Re: Raised port Stude heads
« Reply #87 on: February 29, 2012, 07:23:17 PM »
Couple more pics


Here is the area above "Jack's port"


The cardboard keeps the JB Weld from running out.

Offline 38flattie

  • Hero Member
  • *****
  • Posts: 2169
    • http://www.flatcadracing.org/
Re: Raised port Stude heads
« Reply #88 on: February 29, 2012, 07:25:40 PM »
Zennog, this is pretty cool. I really like these projects that are a 'little out there'! :cheers:

I wish you were closer, for when I start the port/block mods for the next Flatcad!
With sufficient thrust, pigs fly just fine. However, this is not necessarily a good idea. It is hard to be sure where they are going to land, and it could be dangerous sitting under them as they fly overhead. -- RFC 1925

You can't make a race horse out of a pig. But if you work hard enough at it you can make a mighty fast pig. - Bob Akin

http://www.flatcadracing.org/
http://youtu.be/89rVb497_4c

Offline zenndog

  • Full Member
  • ***
  • Posts: 243
Re: Raised port Stude heads
« Reply #89 on: February 29, 2012, 08:01:32 PM »
This is just for a flow test, I am not sure how I would go about making this modification for a running engine.

It has been cold here this week and the epoxy is taking its sweet time to harden.

It will all be clear soon but I want to make the back of the port come up steeper off the valve. I plan to  port into that epoxy I just put in.

I think I am going to use some steel tubing to form the top of the port for this test, which was Rich's suggestion.


You have done plenty of modifications to your current engine and you are taking them to the salt!